ComfyUI 的操作与使用
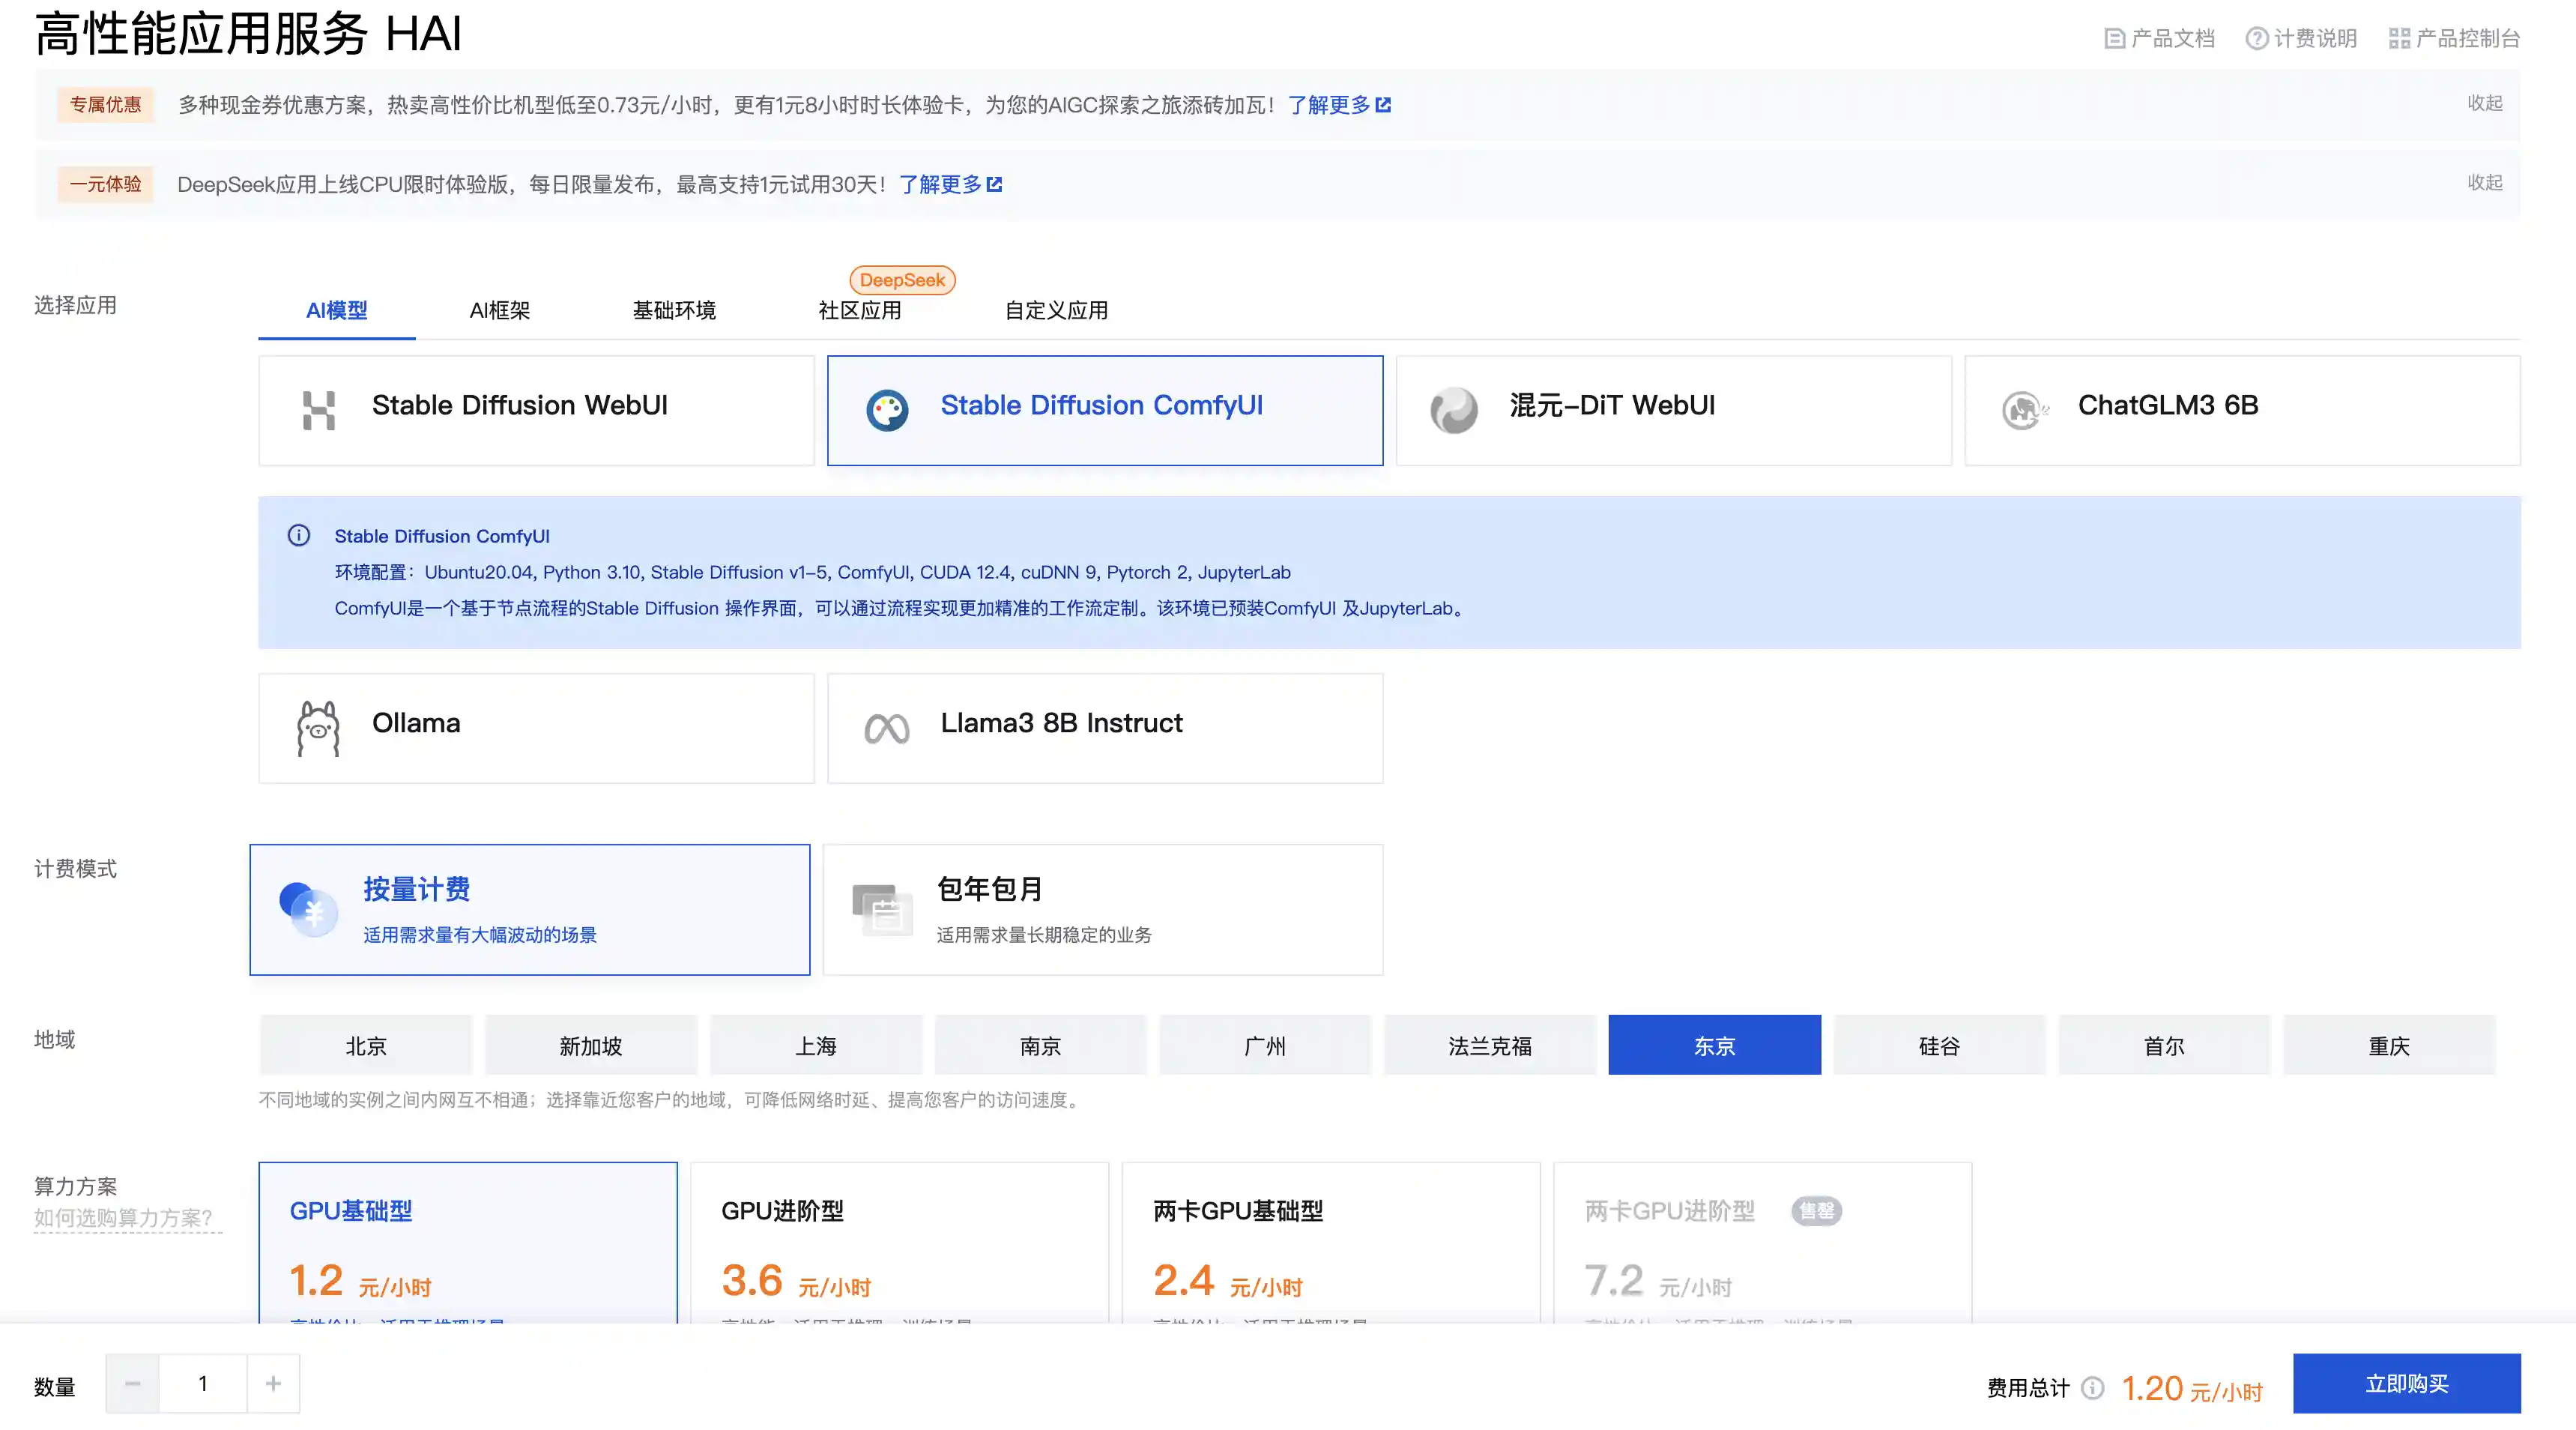
简单起见,又或者是没有 N 卡或者显卡的配置比较低,可以使用 腾讯云 HAI 直接搭建 ComfyUI 服务。
入门使用
可以先 clear 掉当前的 workflow,之后右键新建模块。
首先需要新建一个采样器(KSampler),采样器的配置如下:
| 参数 | 值 | 说明 |
|---|---|---|
| seed | 0 | 随机种子,控制生成结果的随机性。相同种子会产生相同结果 |
| control_after_generate | randomize | 生成后种子控制方式:randomize(随机化)、increment(递增)、decrement(递减)、fixed(固定) |
| steps | 20 | 采样步数,通常 15-30 步较为合适。步数越多质量越好但耗时更长 |
| cfg | 8.000 | CFG 引导强度,控制 AI 对提示词的遵循程度。范围 1-20,推荐 7-12 |
| sampler_name | euler | 采样算法:euler、euler_a、dpm_2、dpm_2_ancestral、lms、ddim 等 |
| scheduler | normal | 调度器类型:normal、karras、exponential、sgm_uniform 等 |
| denoise | 1.000 | 去噪强度,1.0 为完全去噪,0.0 为不去噪。图生图时可调节此值 |
采样器的 model 可以选择 Load Checkpoint。
positive 是正向提示词,negative 是反向提示词,都可以选择 CLIPTextEncode。为了方便区分,可以给 prompt 修改一个有意义的标题。
latent_image 可以设置图片的选项,例如 EmptyLatentImage。
LATENT 可以选择 VAE Decode 模块,然后可以添加一个图片预览模块。
多图合并,使用同一个背景
输出大小设置为图片背景总大小。
图片正向 prompt 输出拖拽,然后添加 Conditioning(Set Area) 节点,在其中设置图片的大小和图片在背景画布中的位置。
使用 ConditioningCombine 节点,合并多个 Conditioning 节点,之后把合并节点的输出连接到 KSample。
但是,如果是单纯两个 prompt 直接连到采样器,两张图片会很割裂。解决办法是再新建一个 prompt,之后把两张图片的输出和这个 prompt 使用一个 combine 进行合并,之后合并结果再输出到采样器。
模型
CheckPoints(检查点模型)是 Stable Diffusion 的核心基础模型,包含了完整的图像生成能力。它是一个预训练的神经网络模型,决定了生成图像的整体风格、质量和特征。
常用 CheckPoints 模型类型:
| 模型类型 | 特点 | 适用场景 | 推荐模型 |
|---|---|---|---|
| SD 1.5 系列 | 经典基础模型,兼容性好 | 入门学习,插件丰富 | v1-5-pruned-emaonly.ckpt |
| SDXL 系列 | 更高分辨率,质量更好 | 高质量出图 | sd_xl_base_1.0.safetensors |
| 写实人像 | 专注真实人物生成 | 人像摄影、写实风格 | realisticVisionV60B1_v51VAE.safetensors |
| 动漫二次元 | 卡通动漫风格 | 动漫插画、角色设计 | anything-v5-PrtRE.safetensors |
| 艺术绘画 | 艺术风格强烈 | 创意艺术、概念设计 | dreamshaper_8.safetensors |
| 建筑风景 | 专注场景和建筑 | 建筑设计、风景画 | architectureExterior_v40.safetensors |
模型文件格式:.ckpt:早期格式,文件较大;.safetensors:更安全的格式,加载速度快,推荐使用;.pt:PyTorch 原生格式
使用 LoRA 模型:在主模型的 MODEL 节点拖拽,可以新增 LoRA 节点,之后把 LoRA 的模型替代主模型连接到采样器上面。同样的,主模型的 CLIP 需要连接到 LoRA 上面,之后把正向 prompt 连接到 LoRA 就可以了(反向 prompt 还是连接在 CheckPoint 的 CLIP 上面)。
LoRA 和 Checkpoint 的定义区别如下
| 名称 | 定义 |
|---|---|
| Checkpoint | 模型的权重文件,是模型在某个训练时刻的完整状态的保存,通常包括整个模型的参数、优化器状态等。 |
| LoRA(Low-Rank Adaptation) | 一种参数高效的微调方法,不直接修改原始模型参数,而是在模型某些层中引入少量可训练参数,从而在不改变大模型主体的前提下实现微调。 |
它们有着各自不同的使用目的
| 比较项 | Checkpoint | LoRA |
|---|---|---|
| 目标 | 保存和恢复训练过程或完整模型 | 节省参数、内存,快速高效地微调大模型 |
| 应用场景 | 模型训练中断恢复、部署模型 | 微调大语言模型、个性化调整、插件式部署 |
| 文件大小 | 通常非常大(几百 MB 到几十 GB) | 非常小(几 MB 到几十 MB) |
实际操作
首先我们打开腾讯云的 HAI 界面,并新建一个 ComfyUI 的服务
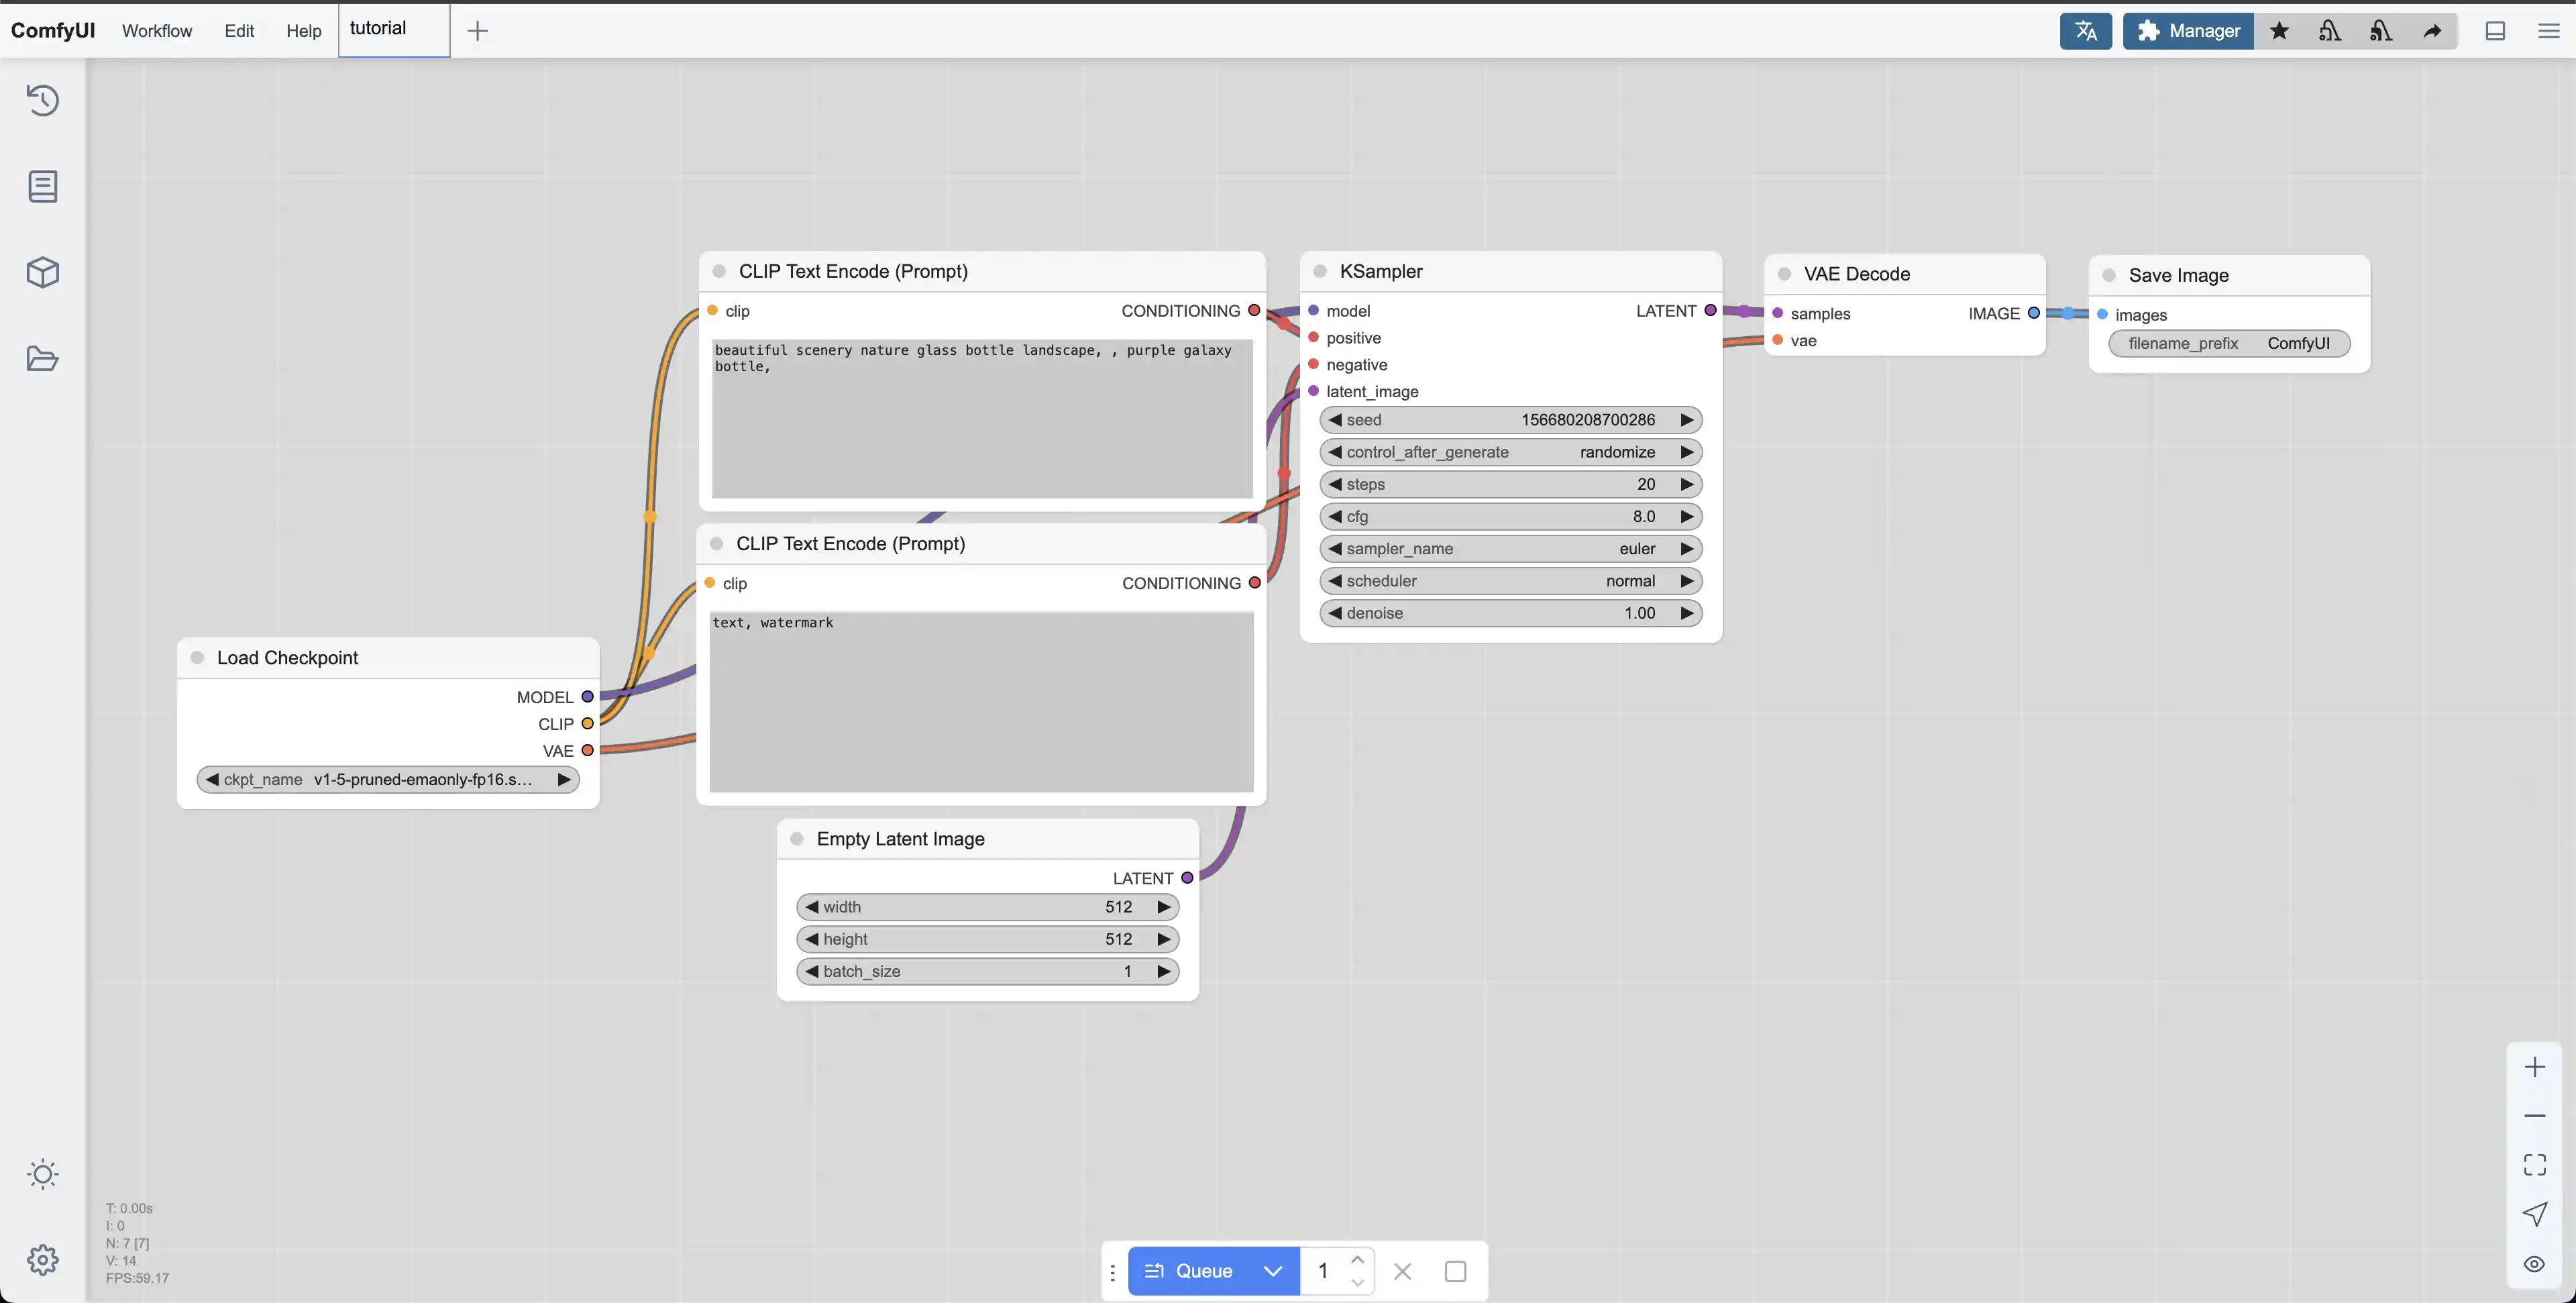
服务创建好了之后我们打开对应的 ComfyUI 服务地址,可以看到如下界面
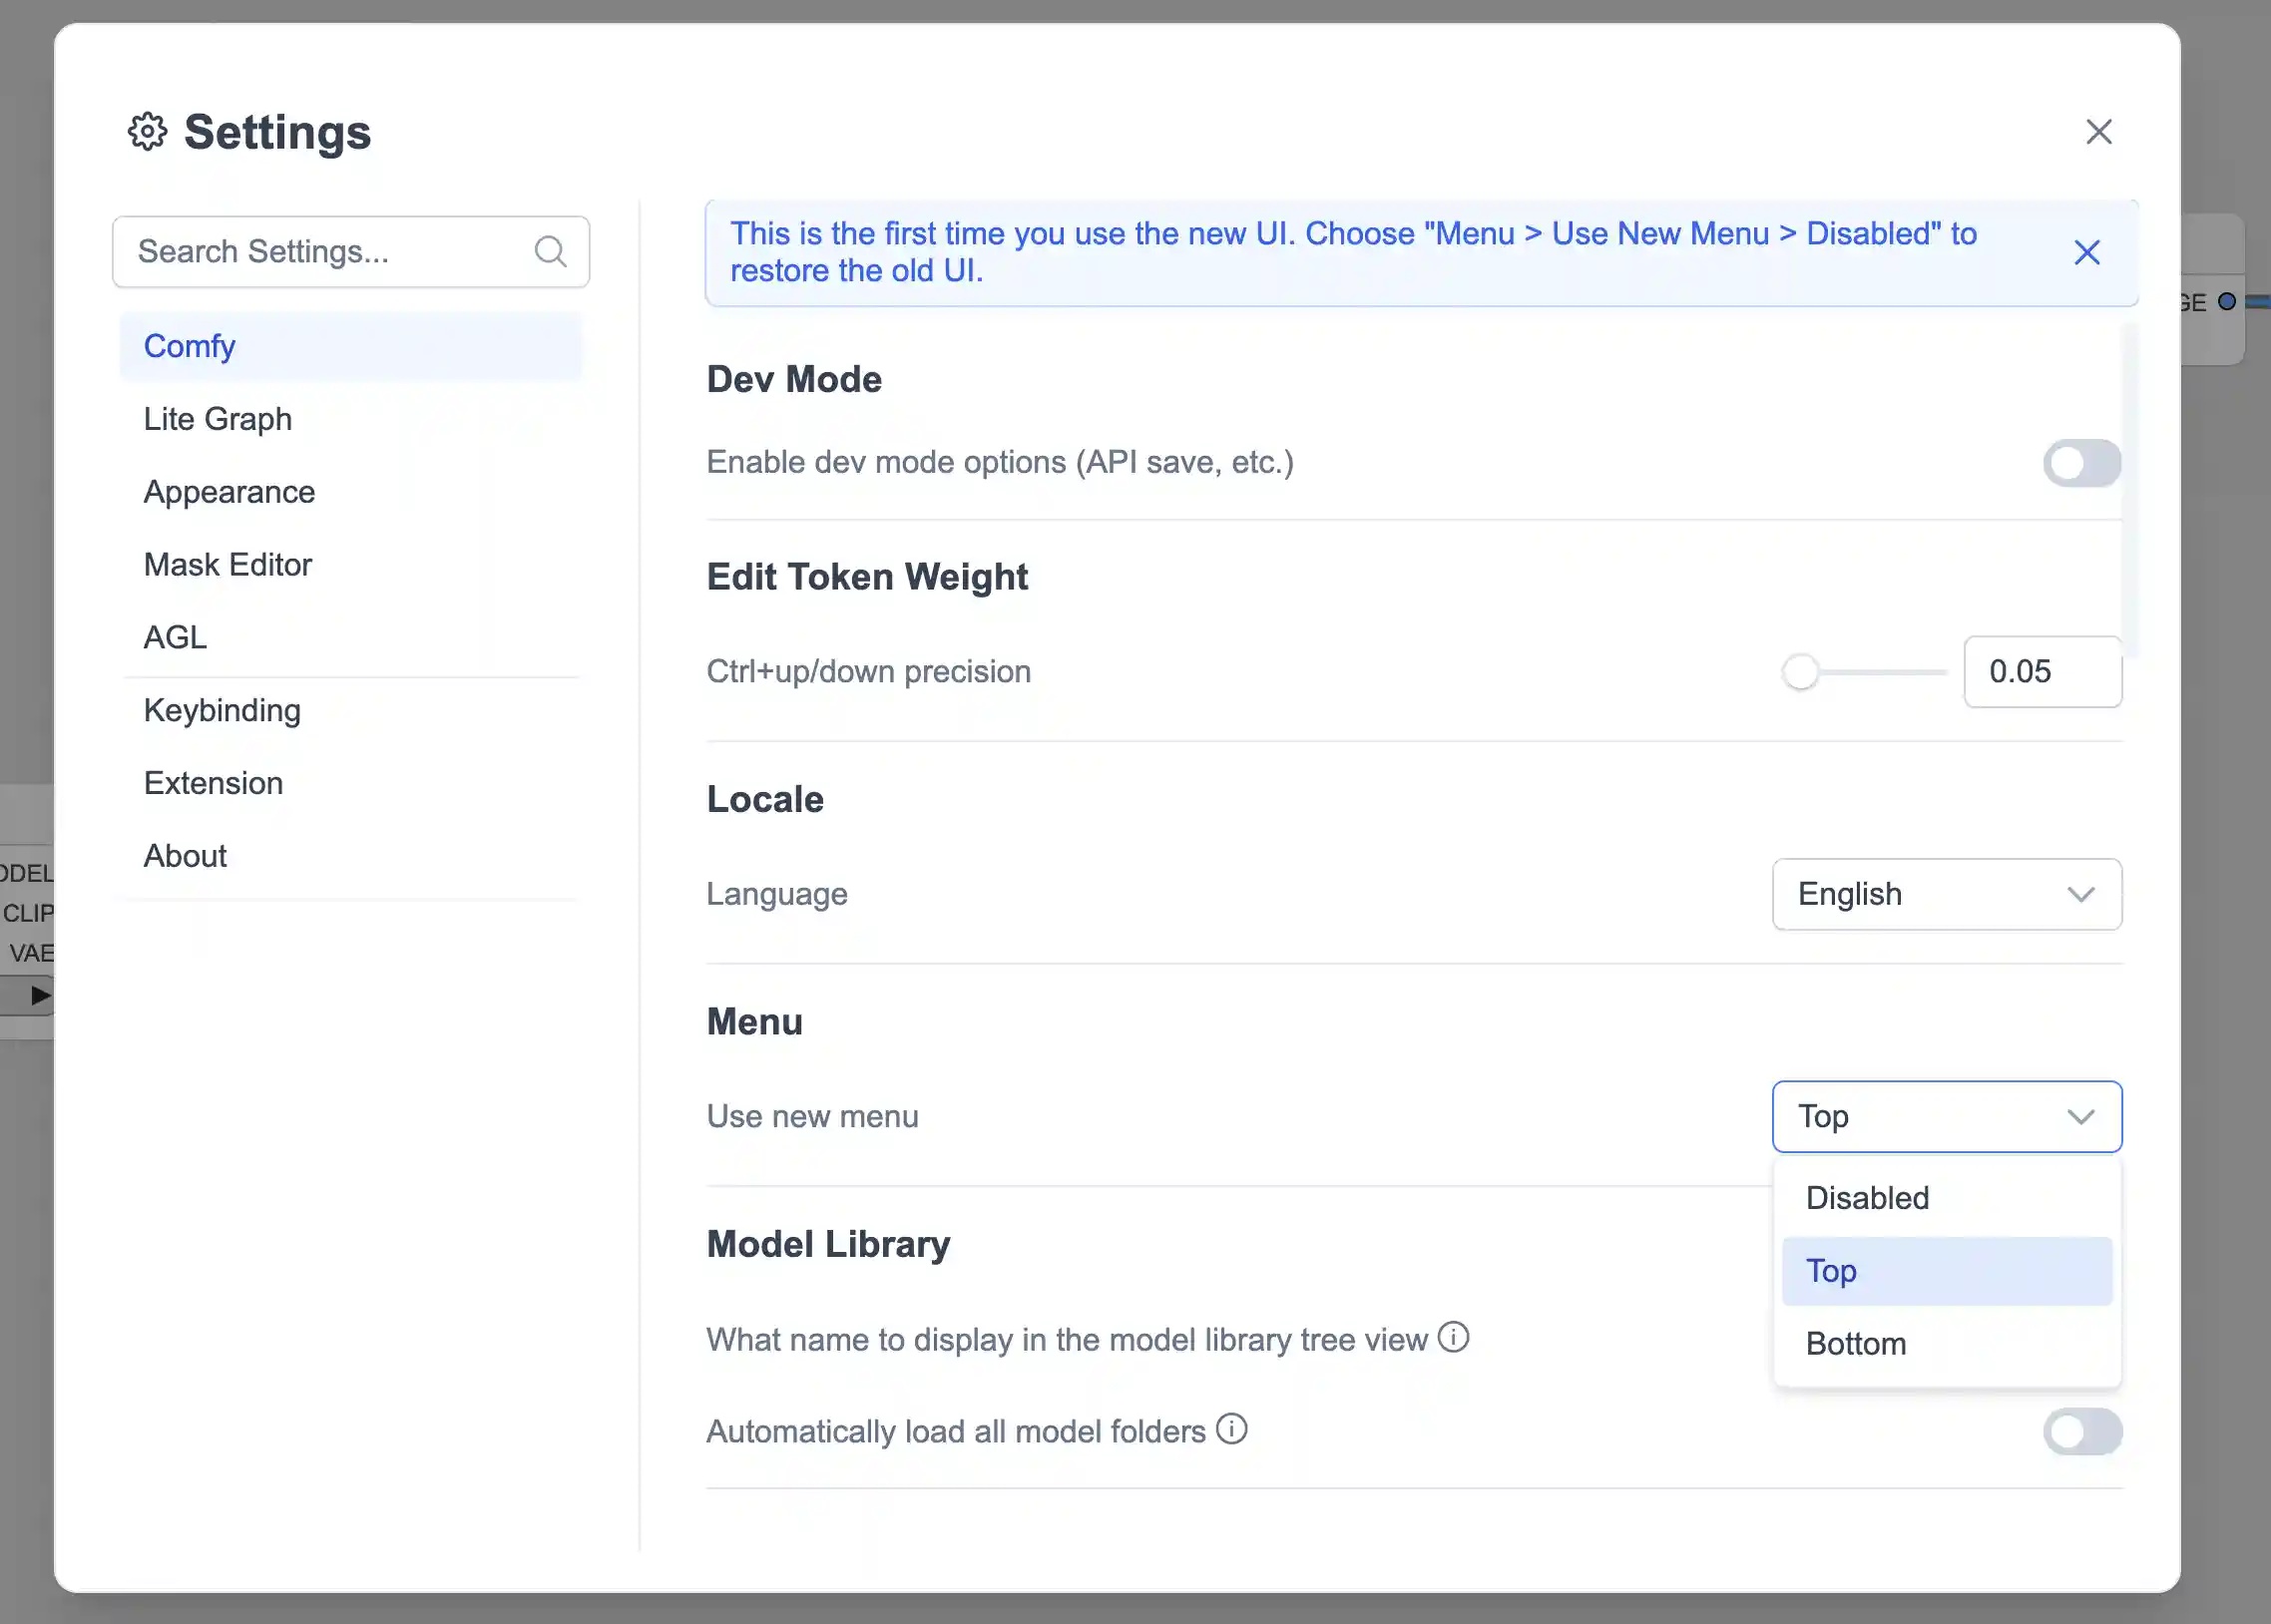
这里我们禁用掉新版 UI,并且安装 Crystools 节点
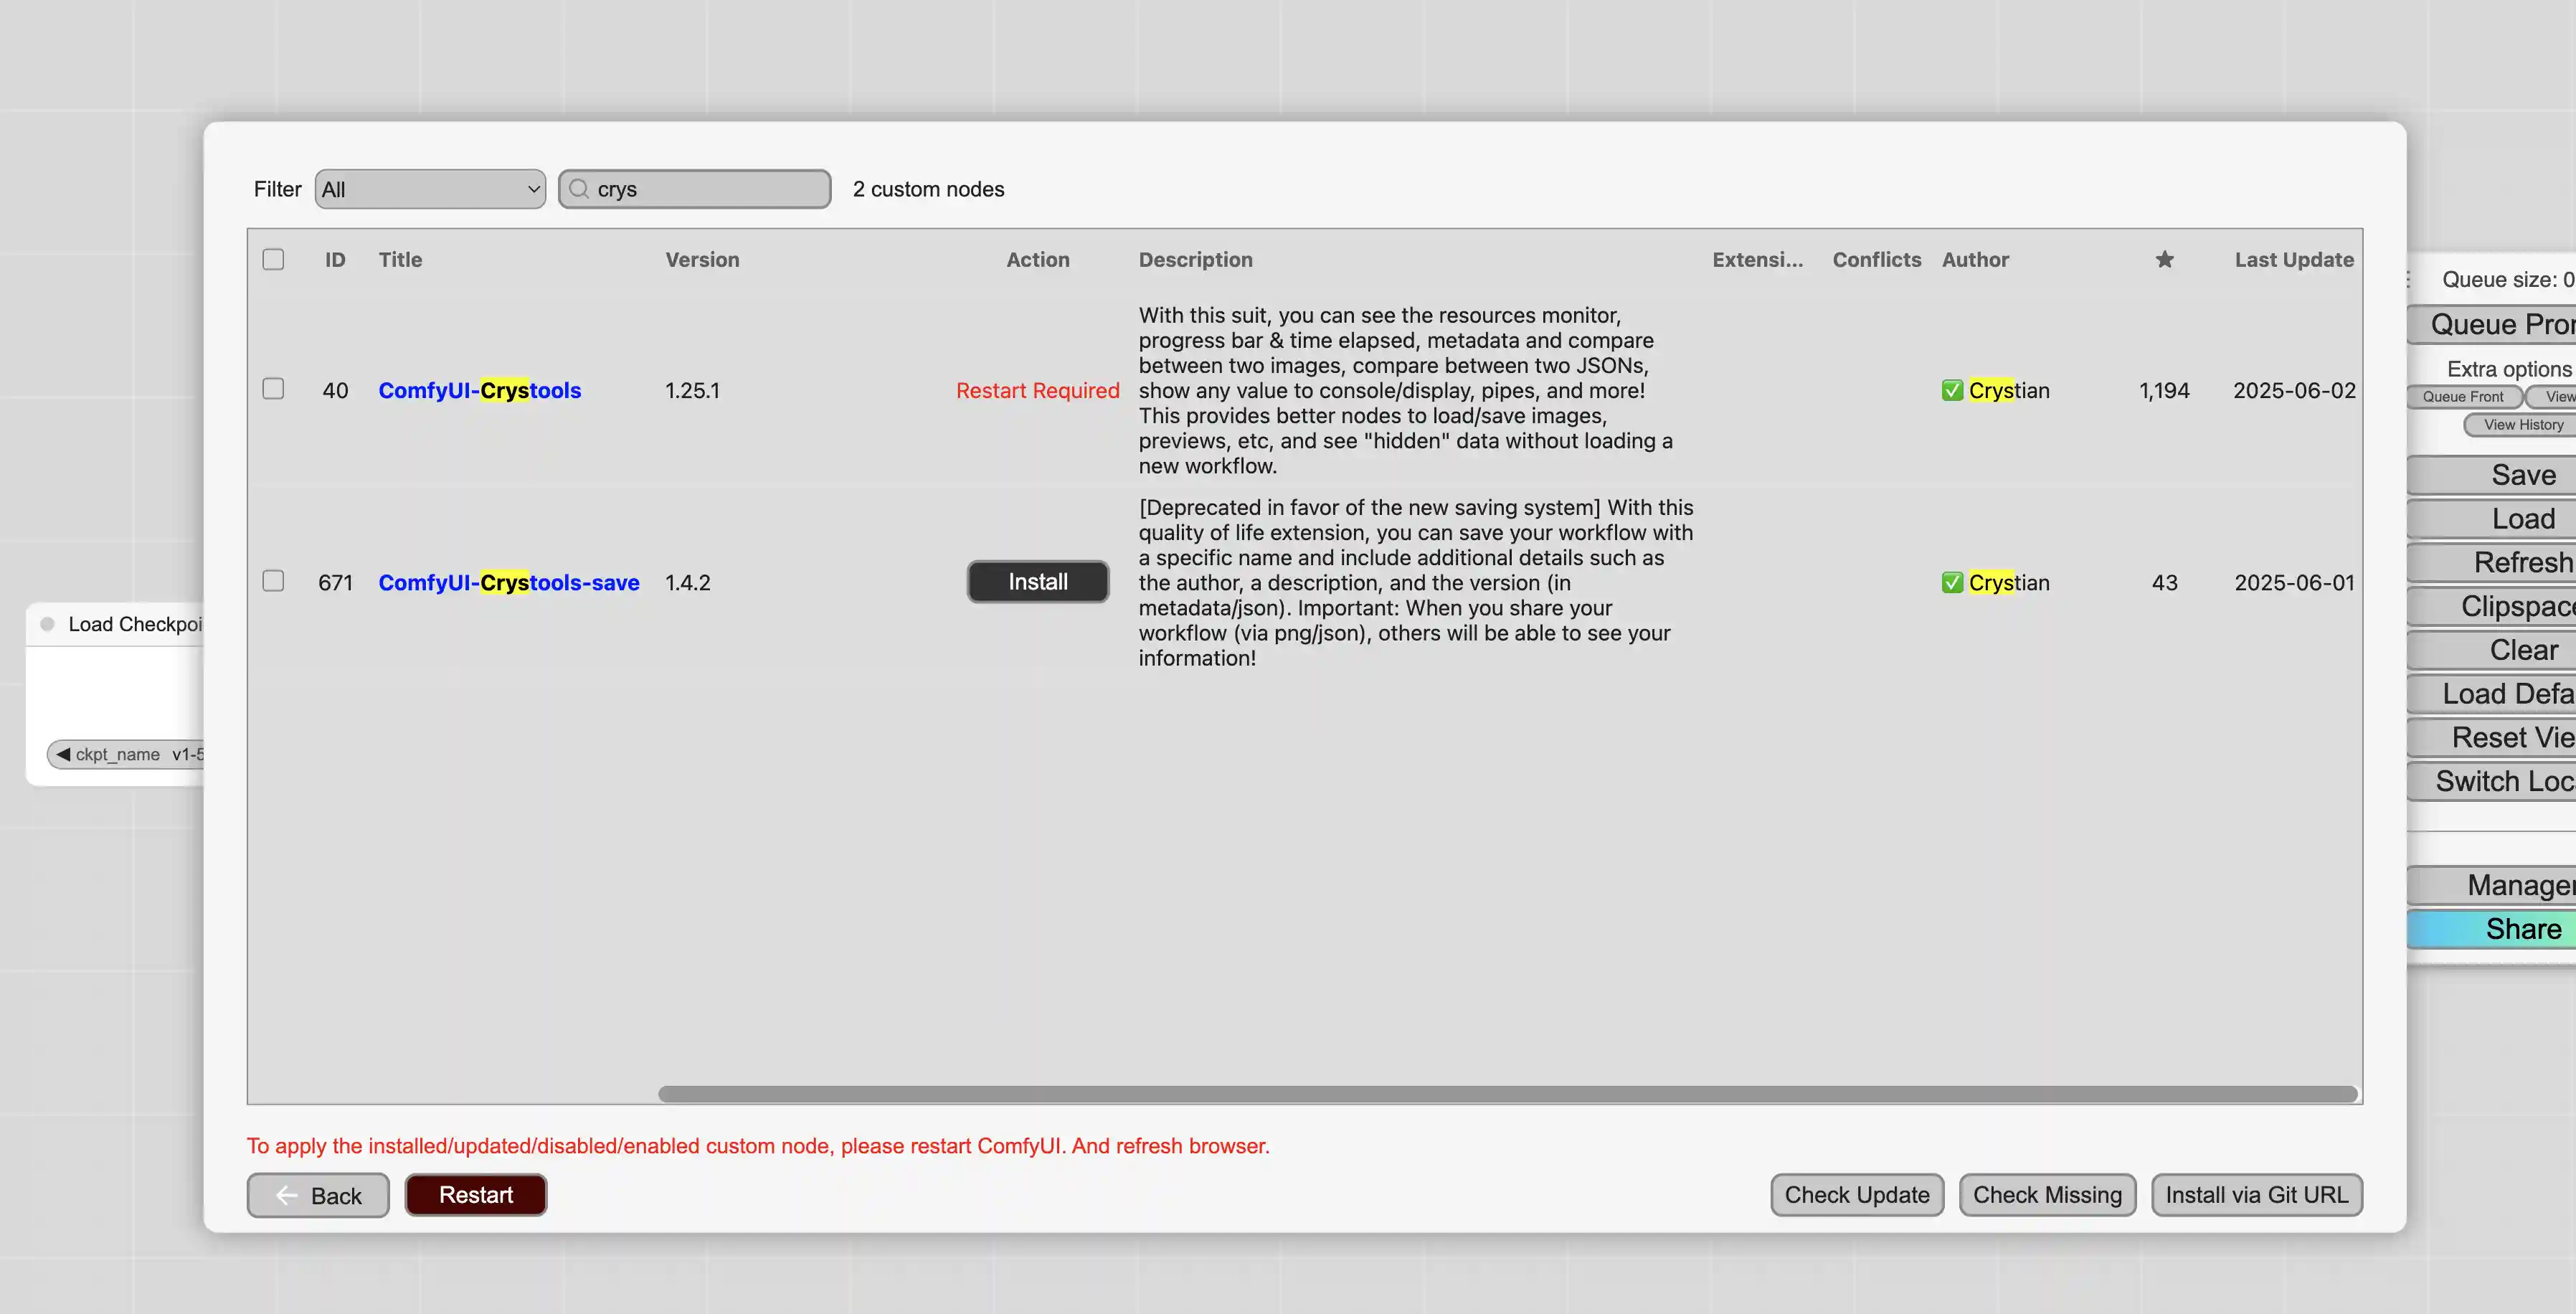
之后我们可以看到界面会变成如下样式
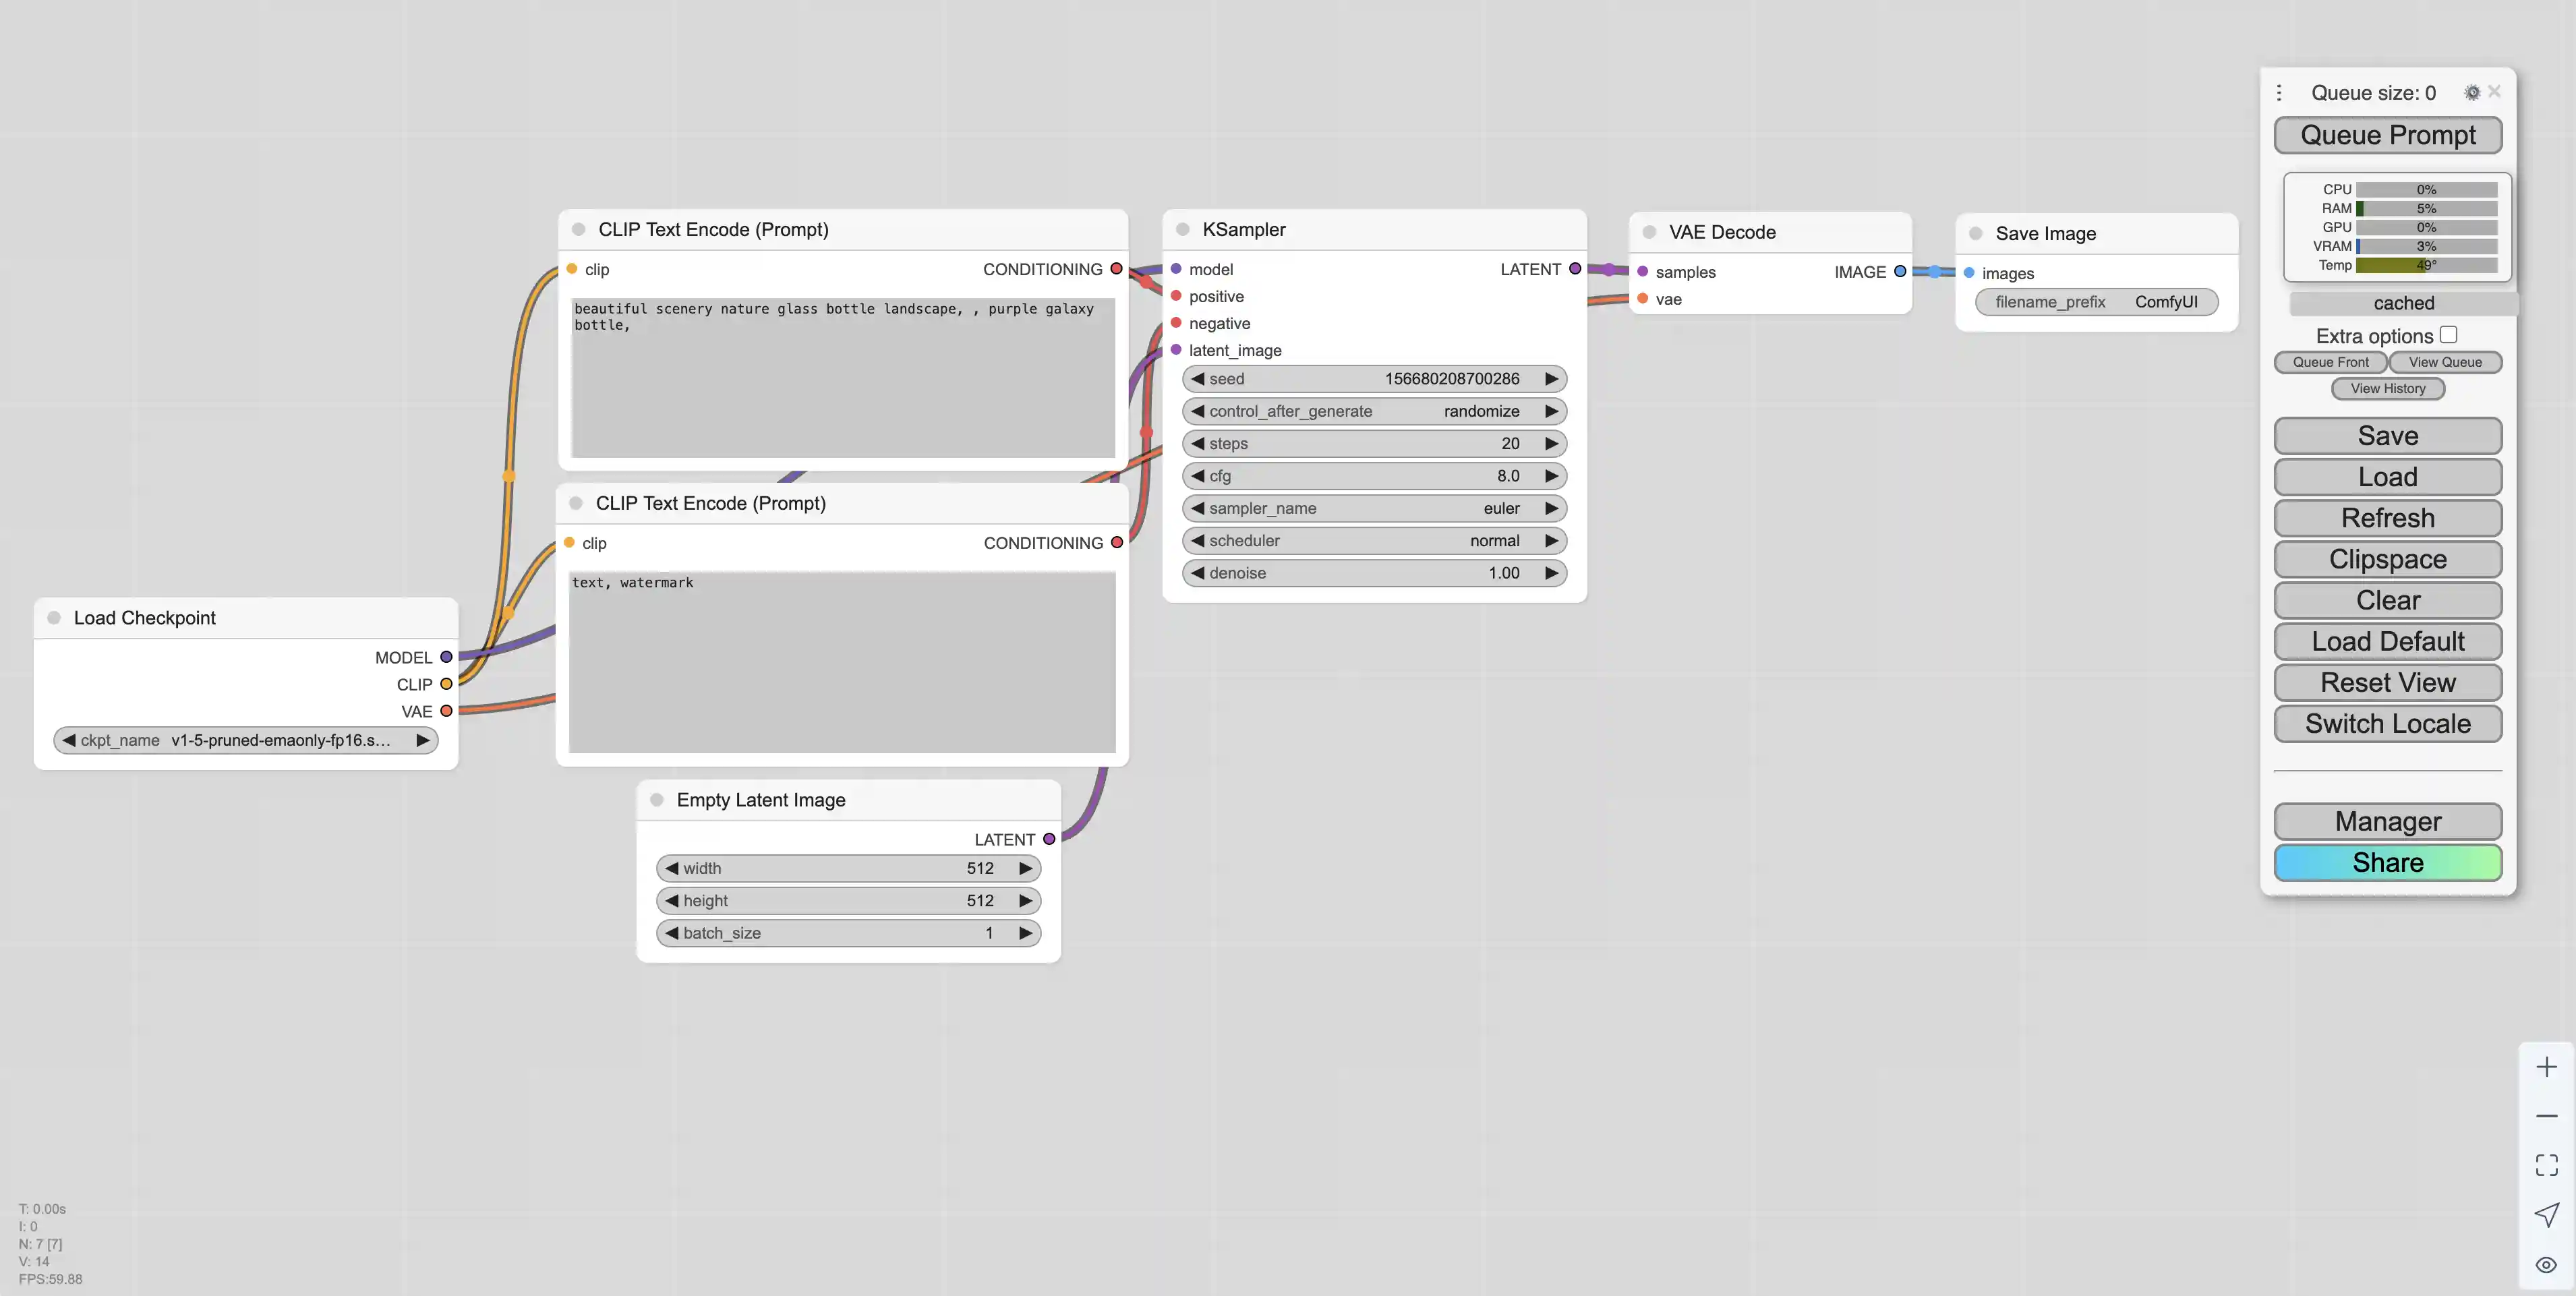
随后我们下载并安装 realisticVision 模型
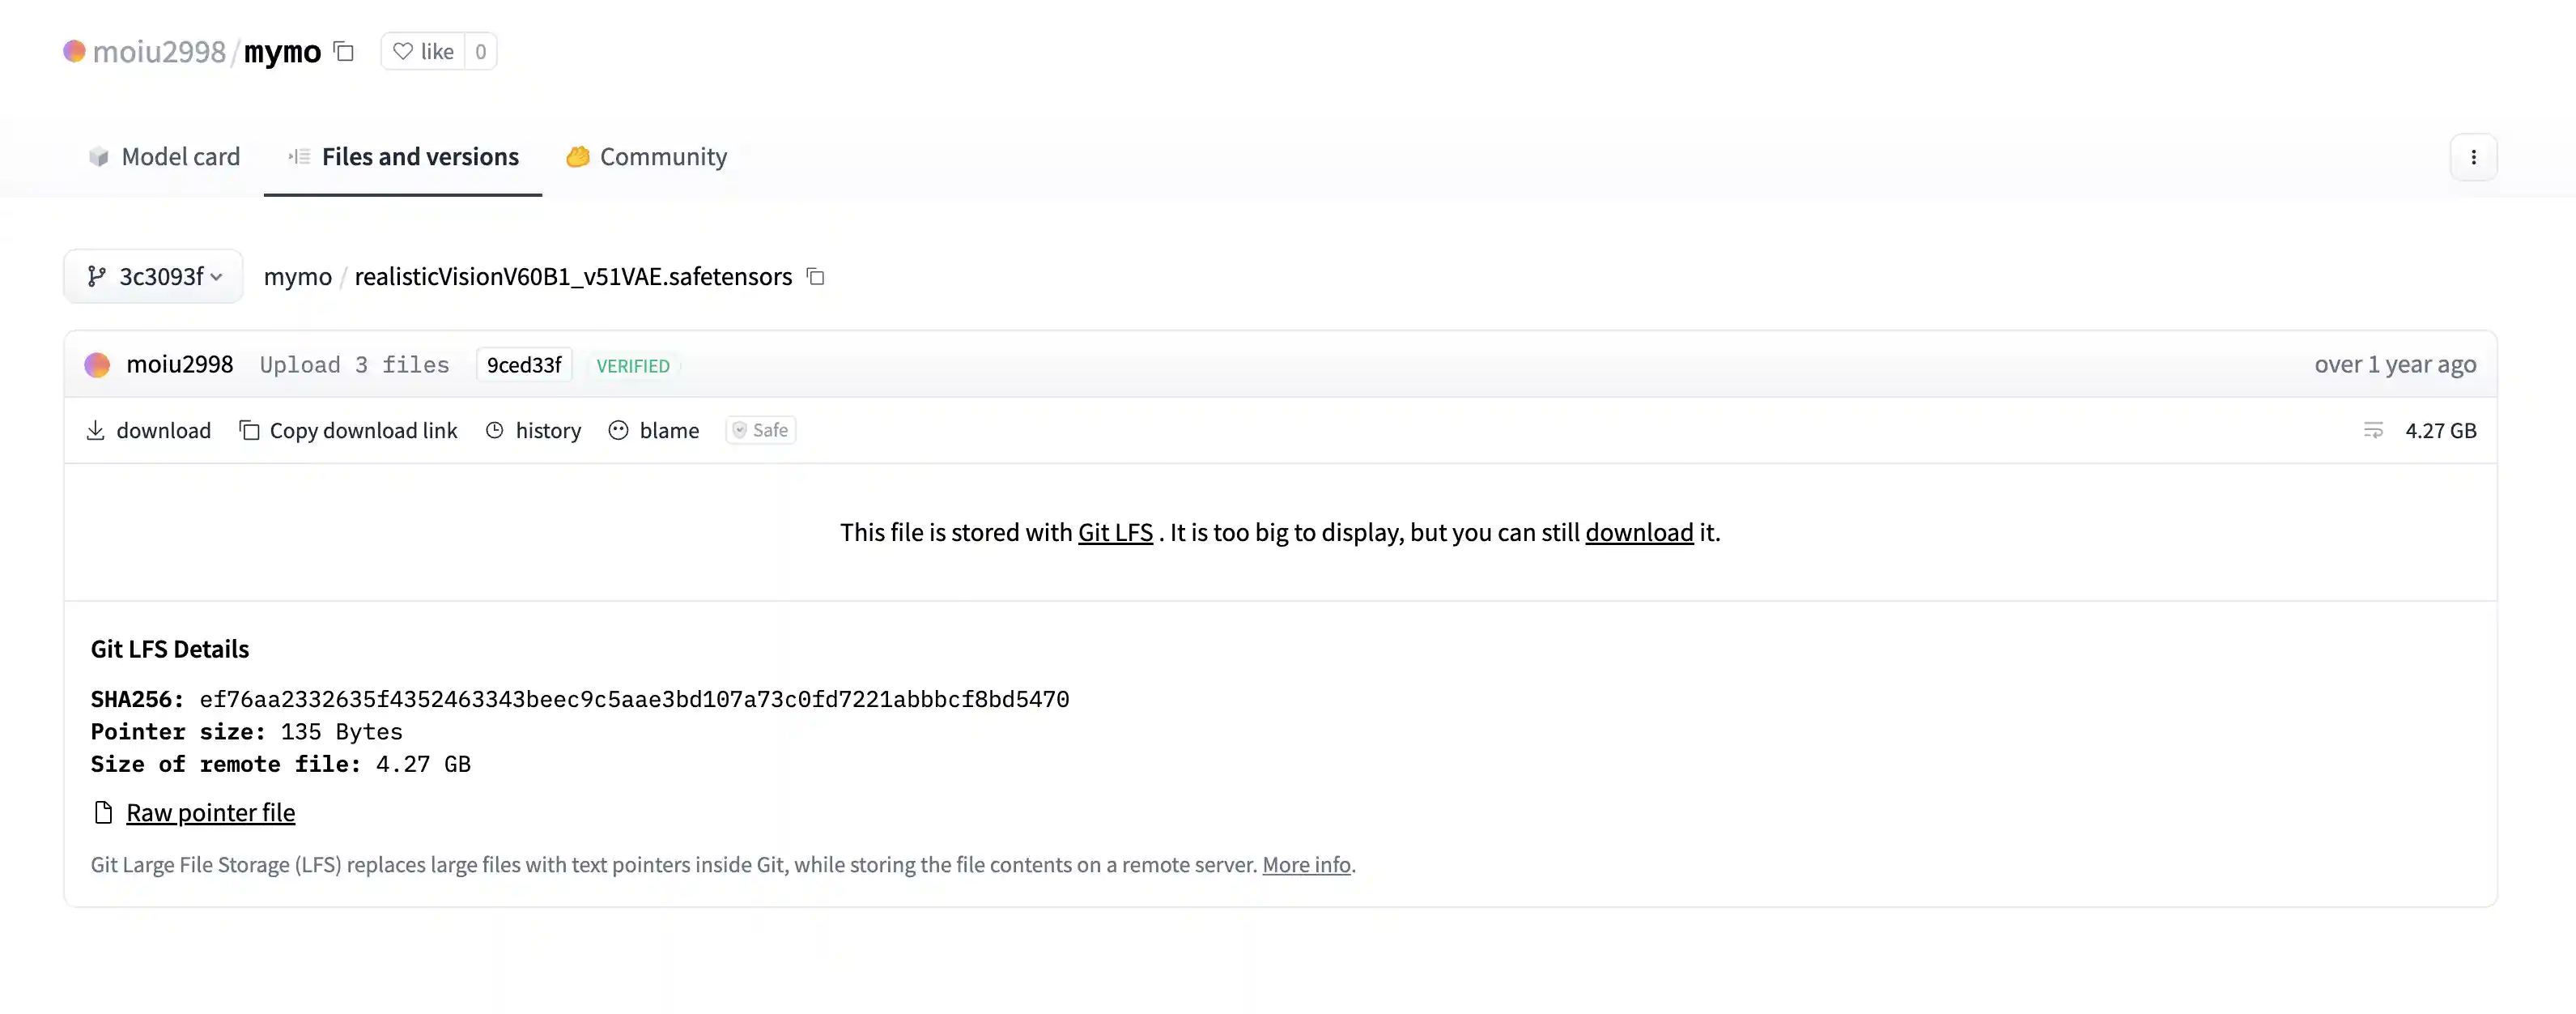
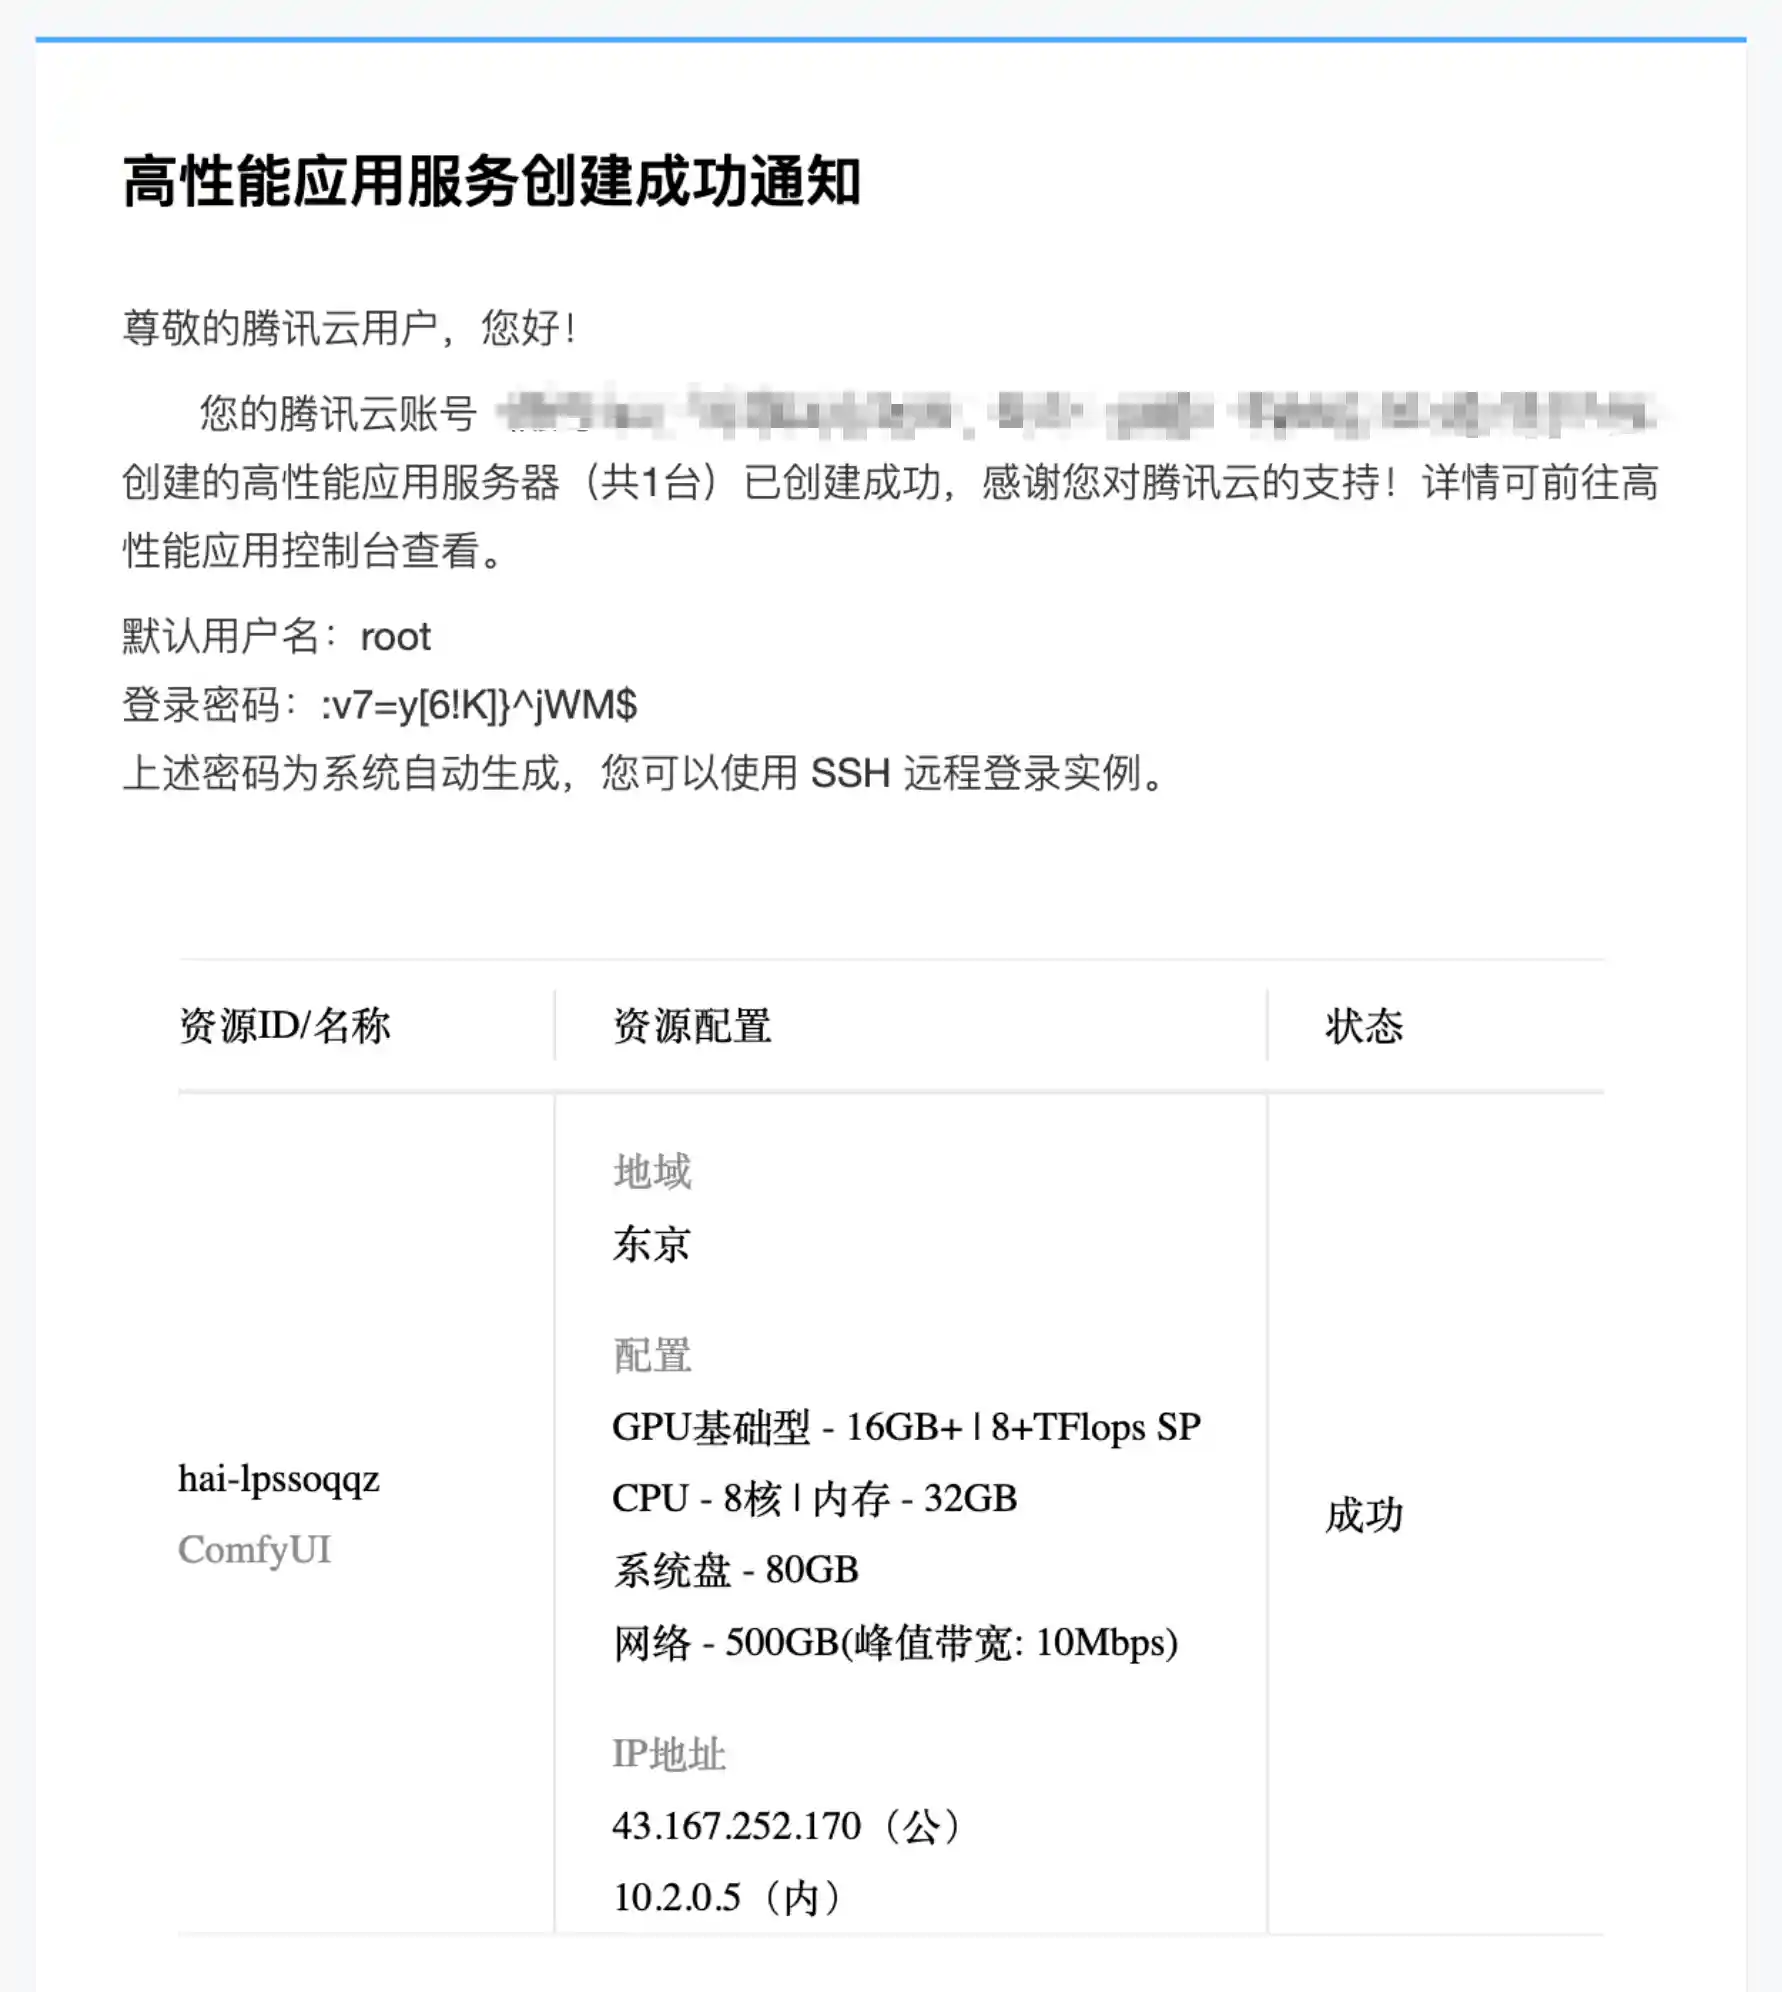
创建好服务的密码等信息会通过站内信的方式进行发送,可以使用这些信息登录到机器上,之后在机器上面下载 realisticVision 模型
在ComfyUI/models/checkpoints/文件夹里面下载该模型
1 | (base) root@VM-0-5-ubuntu:~# cd ComfyUI/models/checkpoints/ |
之后点击 Refresh 按钮,可以在 checkpoint 节点里面看到我们刚刚下载的模型
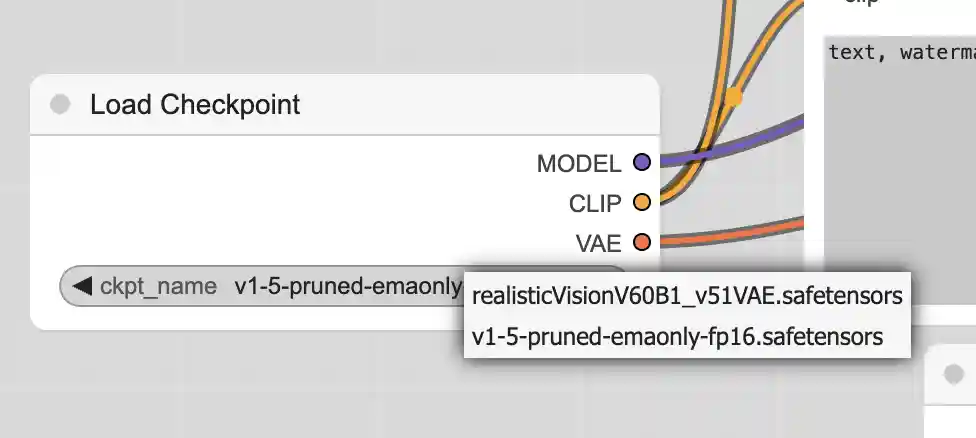
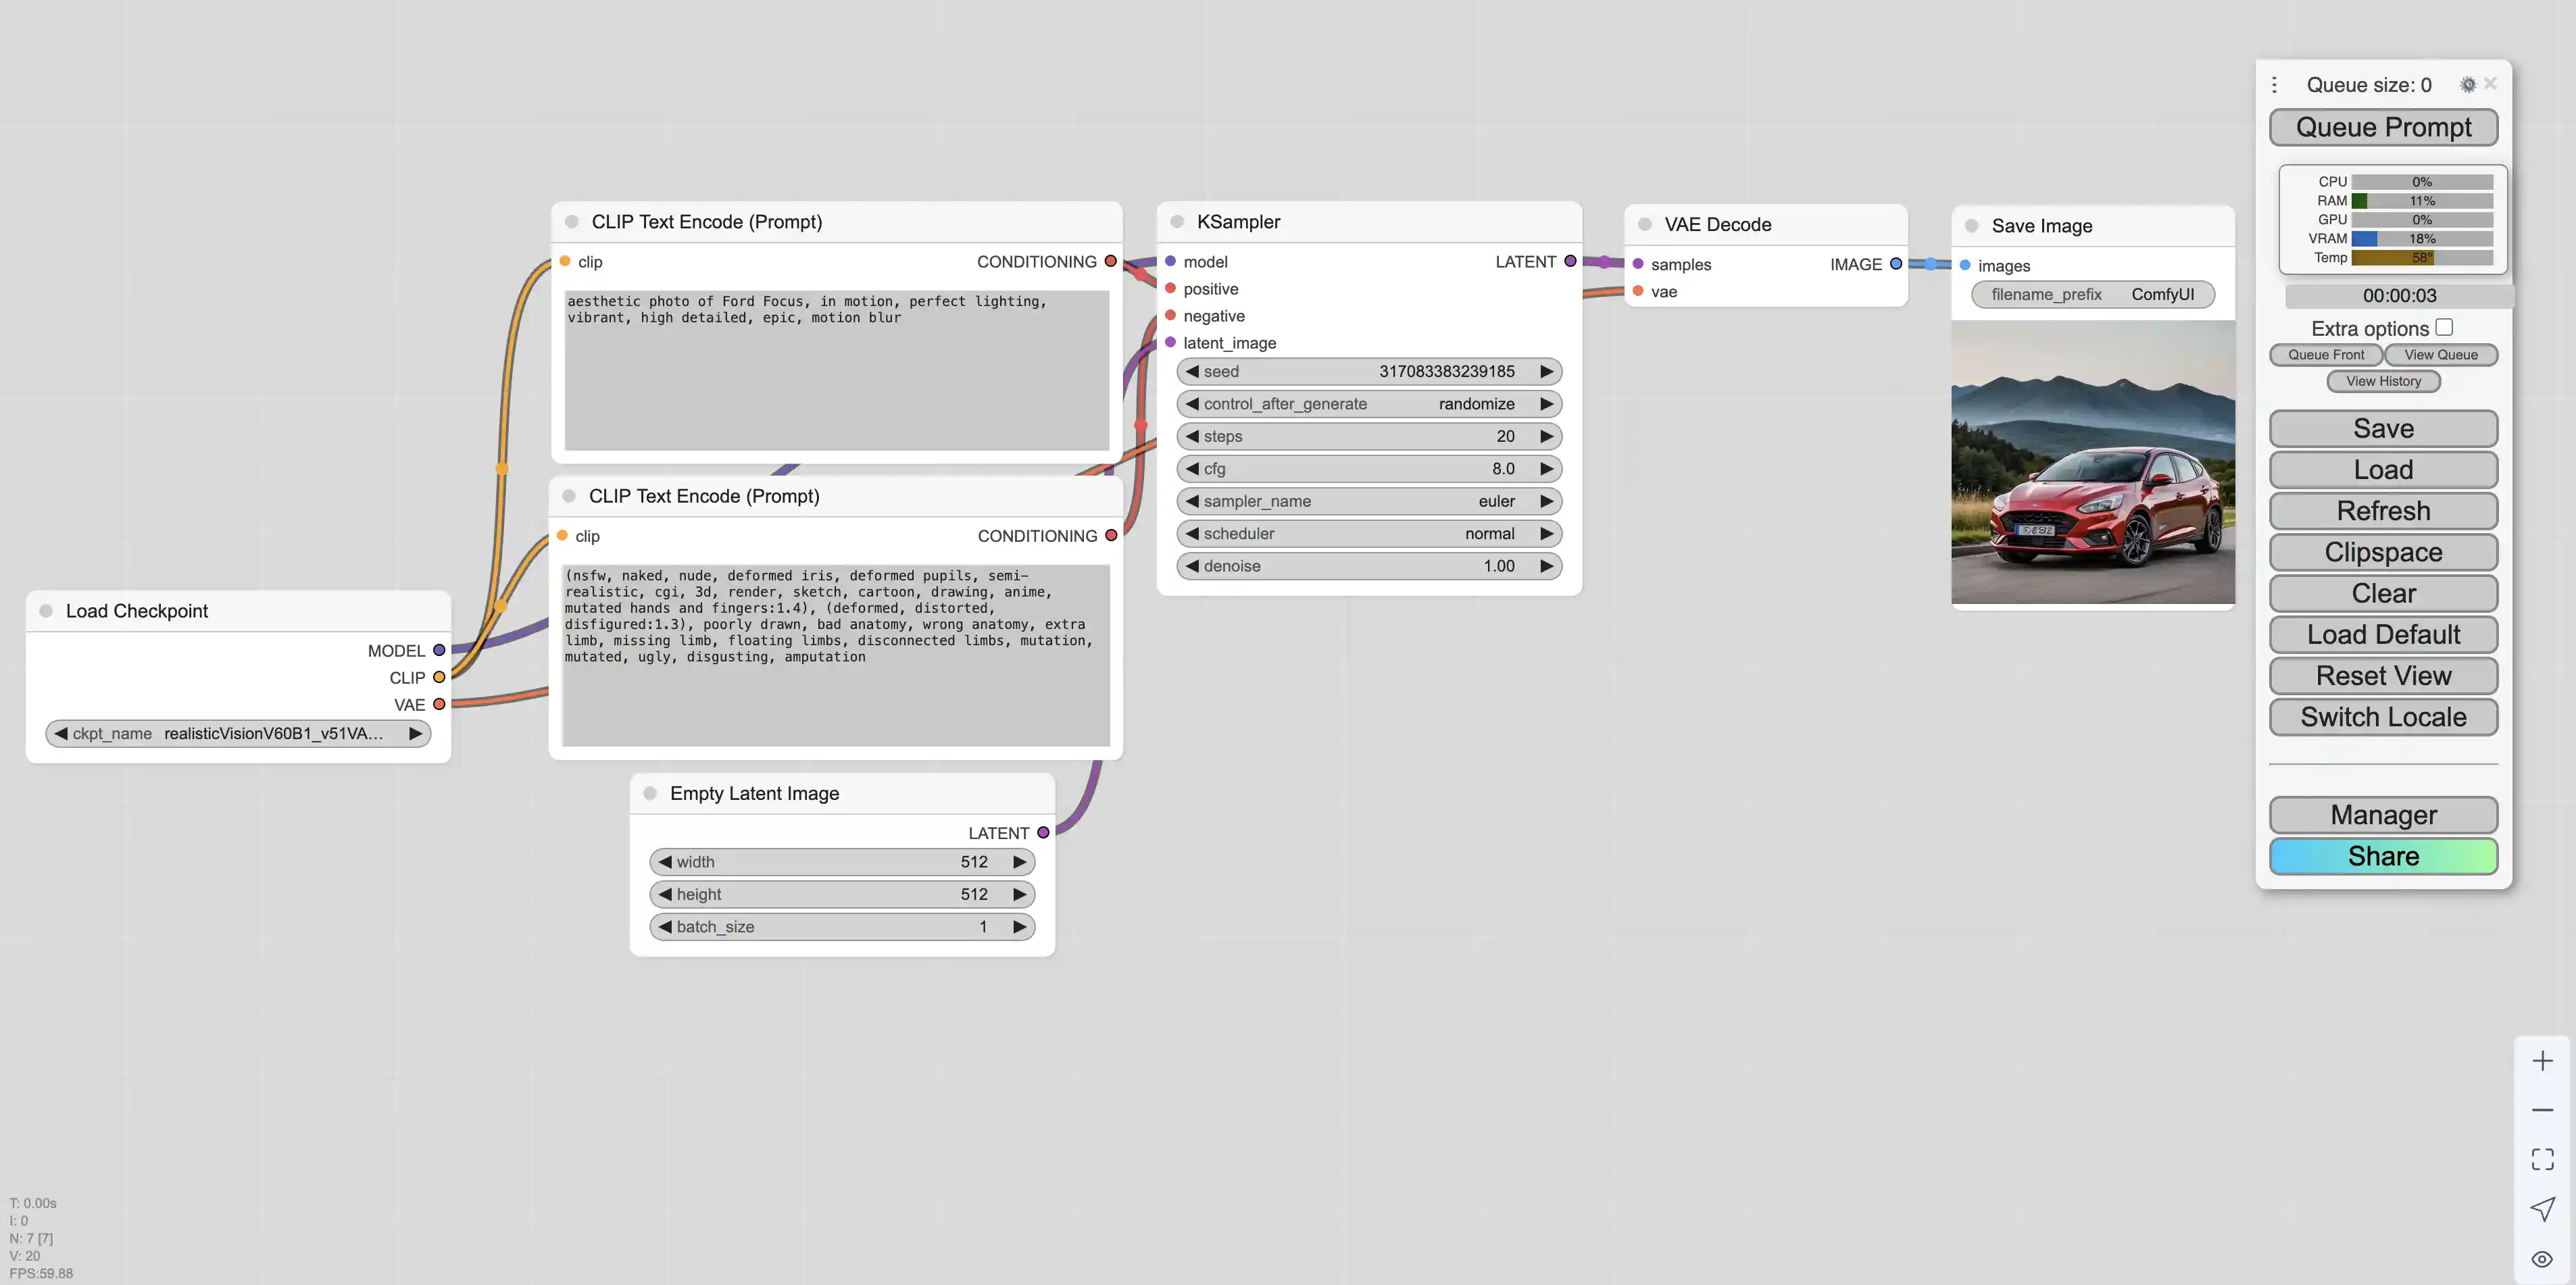
我们使用这个模型根据一些 prompt 可以生成一张福特福克斯的图片
刚刚我们的模型是在 huggingface 上面下载的,civitai 同样也可以下载模型
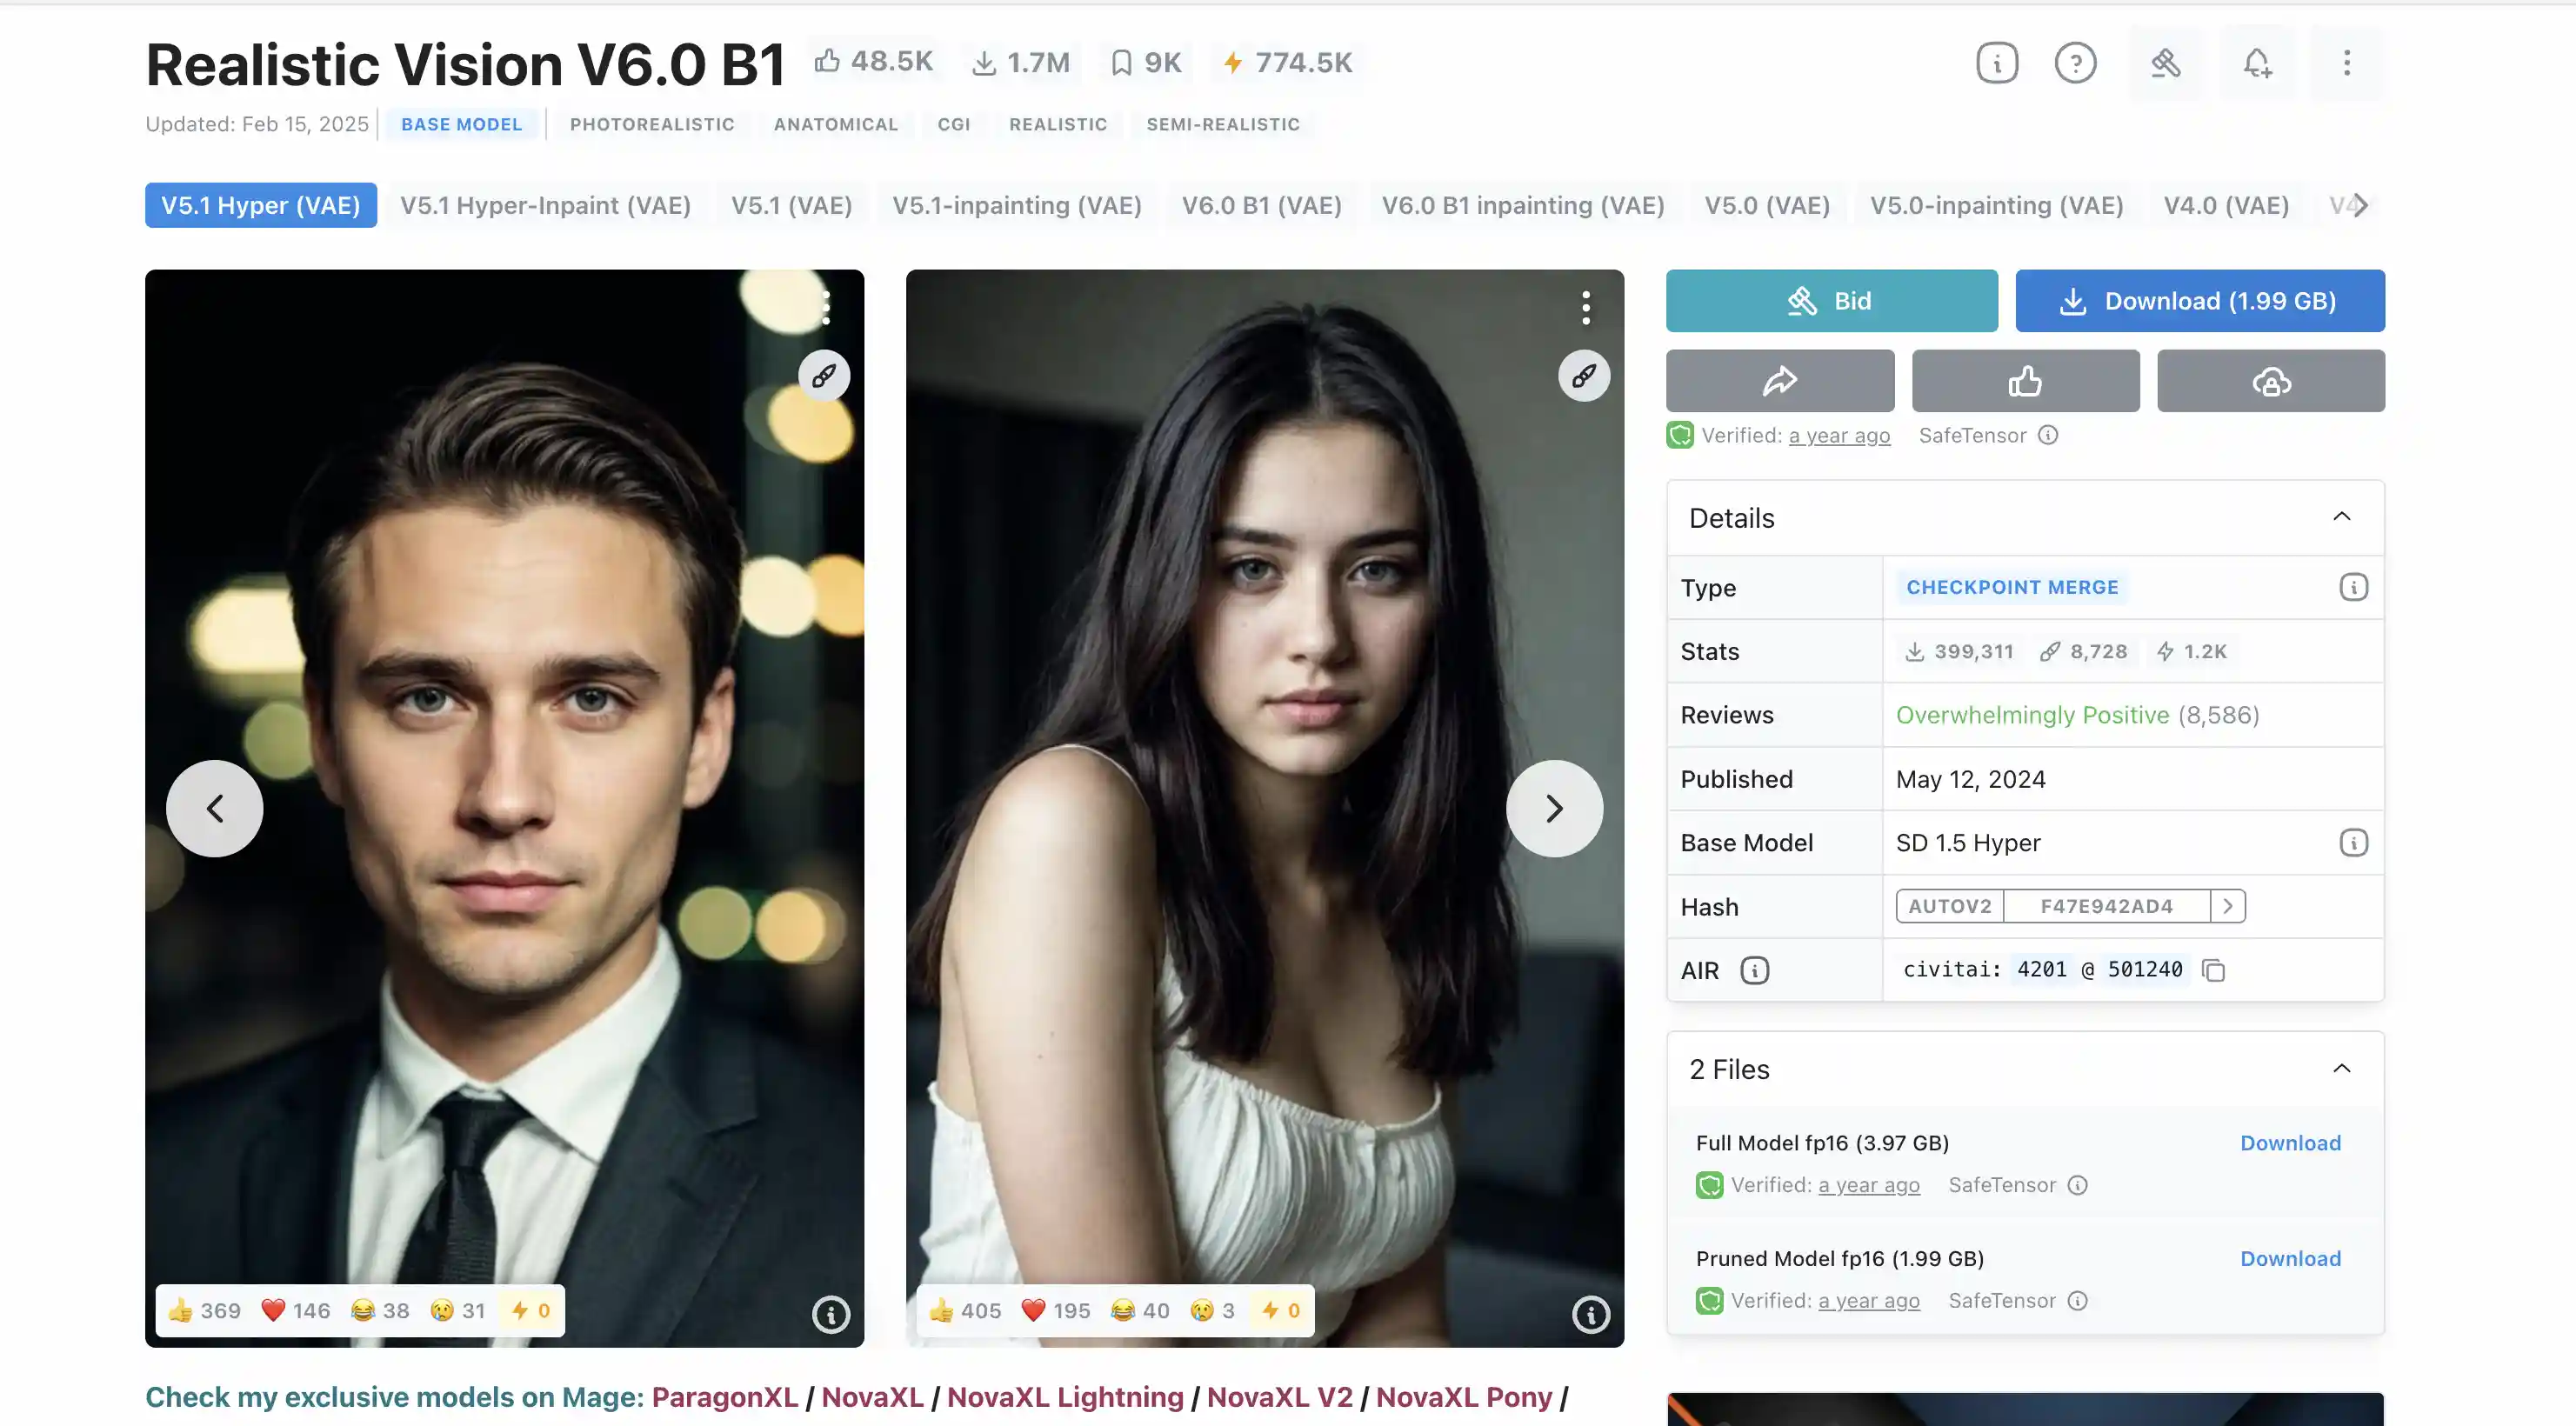
使用命令下载 civitai 的模型,这里需要注册账号生成 token 并把 token 填入到下载链接中
1 | (base) root@VM-0-5-ubuntu:~/ComfyUI/models/checkpoints# wget --content-disposition 'https://civitai.com/api/download/models/501240?type=Model&format=SafeTensor&size=pruned&fp=fp16&token=${API_TOKEN}' |
刷新之后同样可以看到新的模型信息
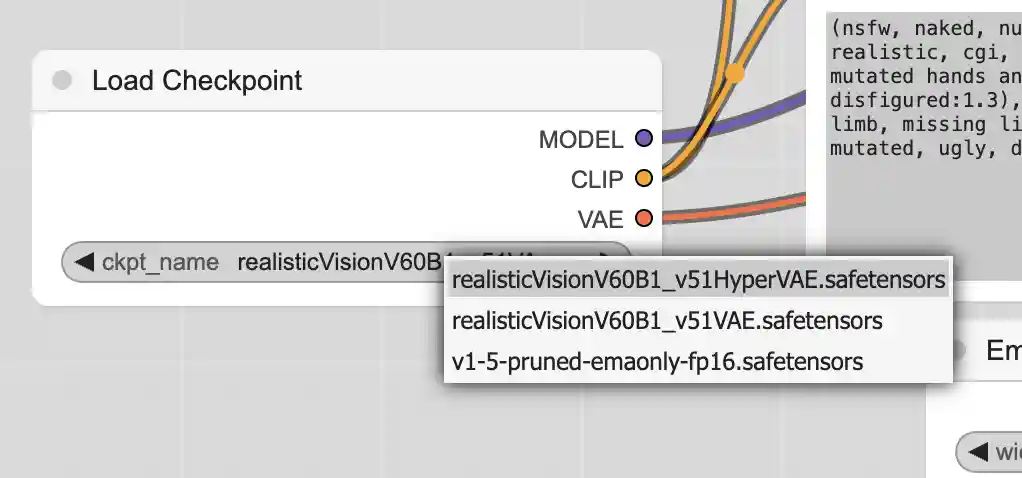
之后我们使用 civitai 上面的推荐配置
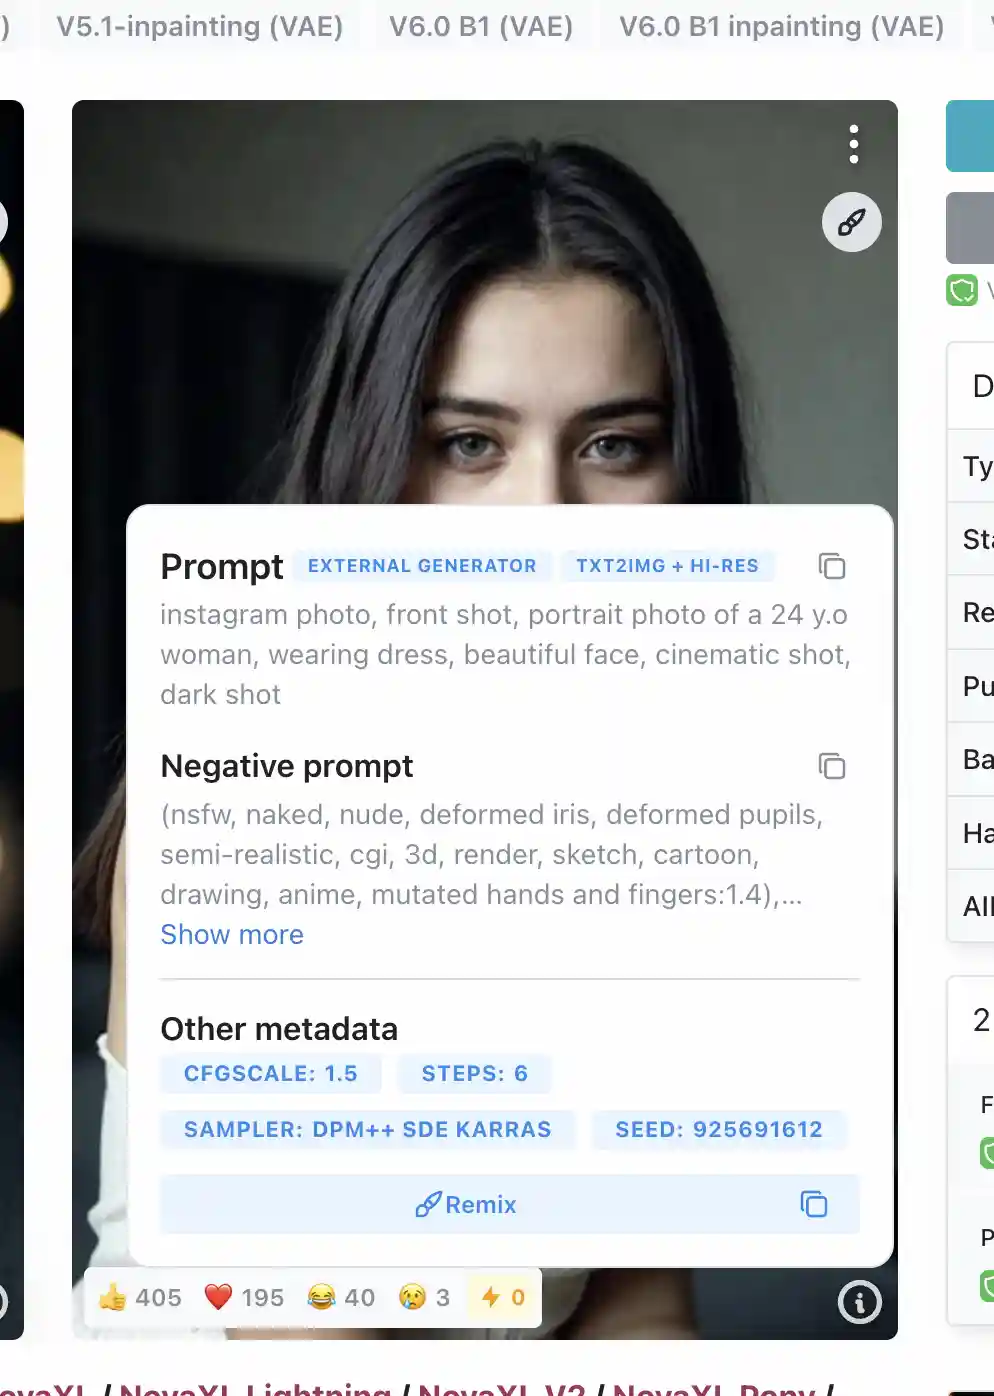
使用推荐配置即可生成相似的图片
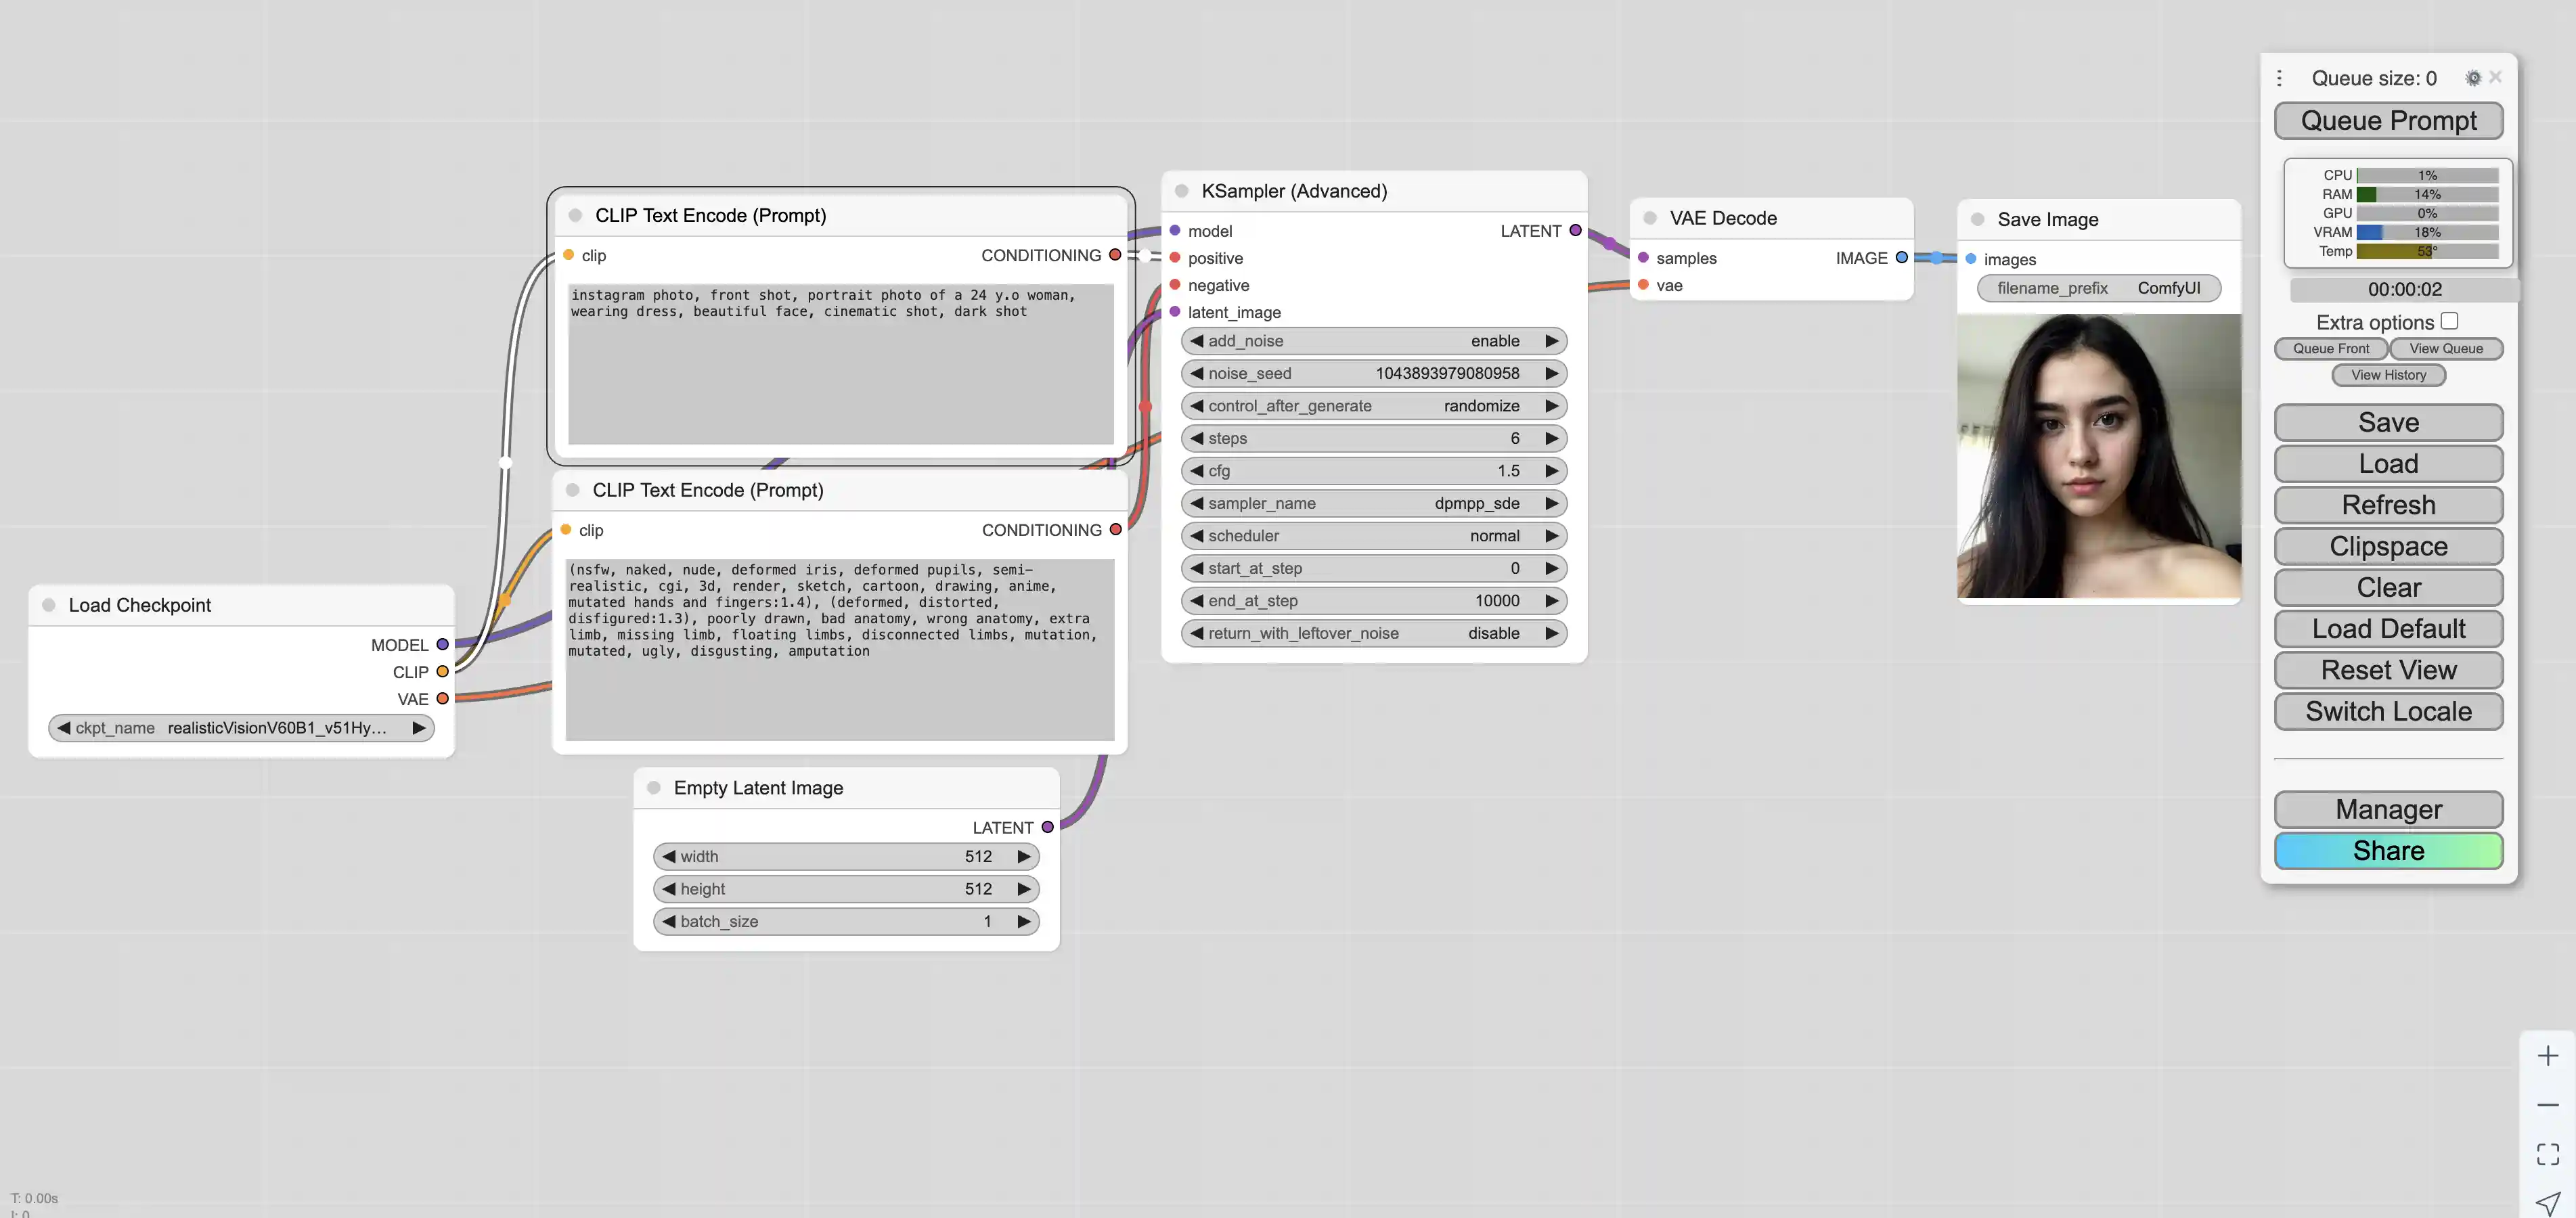
实际生成的图片如下,ComfyUI 生成的图片会包含生成图片时用到的整个工作流,如果需要使用相同的工作流只需要在 ComfyUI 中导入该图片即可
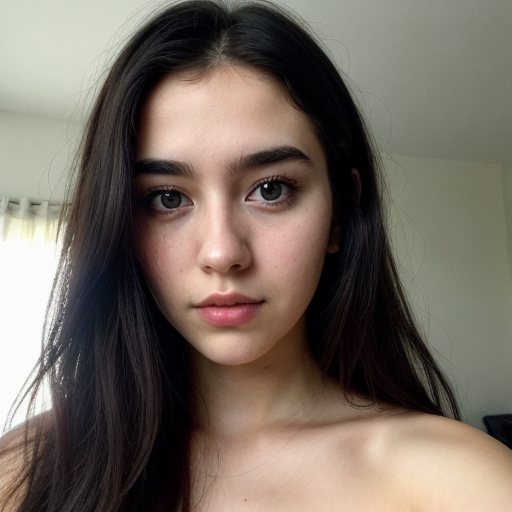
如上图片的信息如下
prompt
1 | {"4": {"inputs": {"ckpt_name": "realisticVisionV60B1_v51HyperVAE.safetensors"}, "class_type": "CheckpointLoaderSimple", "_meta": {"title": "Load Checkpoint"}}, "5": {"inputs": {"width": 512, "height": 512, "batch_size": 1}, "class_type": "EmptyLatentImage", "_meta": {"title": "Empty Latent Image"}}, "6": {"inputs": {"text": "instagram photo, front shot, portrait photo of a 24 y.o woman, wearing dress, beautiful face, cinematic shot, dark shot", "clip": ["4", 1]}, "class_type": "CLIPTextEncode", "_meta": {"title": "CLIP Text Encode (Prompt)"}}, "7": {"inputs": {"text": "(nsfw, naked, nude, deformed iris, deformed pupils, semi-realistic, cgi, 3d, render, sketch, cartoon, drawing, anime, mutated hands and fingers:1.4), (deformed, distorted, disfigured:1.3), poorly drawn, bad anatomy, wrong anatomy, extra limb, missing limb, floating limbs, disconnected limbs, mutation, mutated, ugly, disgusting, amputation", "clip": ["4", 1]}, "class_type": "CLIPTextEncode", "_meta": {"title": "CLIP Text Encode (Prompt)"}}, "8": {"inputs": {"samples": ["10", 0], "vae": ["4", 2]}, "class_type": "VAEDecode", "_meta": {"title": "VAE Decode"}}, "9": {"inputs": {"filename_prefix": "ComfyUI", "images": ["8", 0]}, "class_type": "SaveImage", "_meta": {"title": "Save Image"}}, "10": {"inputs": {"add_noise": "enable", "noise_seed": 794547607621135, "steps": 6, "cfg": 1.5, "sampler_name": "dpmpp_sde", "scheduler": "normal", "start_at_step": 0, "end_at_step": 10000, "return_with_leftover_noise": "disable", "model": ["4", 0], "positive": ["6", 0], "negative": ["7", 0], "latent_image": ["5", 0]}, "class_type": "KSamplerAdvanced", "_meta": {"title": "KSampler (Advanced)"}}} |
workflow
1 | {"last_node_id": 10, "last_link_id": 16, "nodes": [{"id": 9, "type": "SaveImage", "pos": [1451, 189], "size": [210, 270], "flags": {}, "order": 6, "mode": 0, "inputs": [{"name": "images", "type": "IMAGE", "link": 9, "label": "images"}], "outputs": [], "properties": {}, "widgets_values": ["ComfyUI"]}, {"id": 4, "type": "CheckpointLoaderSimple", "pos": [26, 474], "size": [315, 98], "flags": {}, "order": 0, "mode": 0, "inputs": [], "outputs": [{"name": "MODEL", "type": "MODEL", "links": [10], "slot_index": 0, "label": "MODEL"}, {"name": "CLIP", "type": "CLIP", "links": [3, 5], "slot_index": 1, "label": "CLIP"}, {"name": "VAE", "type": "VAE", "links": [8], "slot_index": 2, "label": "VAE"}], "properties": {"Node name for S&R": "CheckpointLoaderSimple"}, "widgets_values": ["realisticVisionV60B1_v51HyperVAE.safetensors"]}, {"id": 7, "type": "CLIPTextEncode", "pos": [413, 389], "size": [425.27801513671875, 180.6060791015625], "flags": {}, "order": 3, "mode": 0, "inputs": [{"name": "clip", "type": "CLIP", "link": 5, "label": "clip"}], "outputs": [{"name": "CONDITIONING", "type": "CONDITIONING", "links": [12], "slot_index": 0, "label": "CONDITIONING"}], "properties": {"Node name for S&R": "CLIPTextEncode"}, "widgets_values": ["(nsfw, naked, nude, deformed iris, deformed pupils, semi-realistic, cgi, 3d, render, sketch, cartoon, drawing, anime, mutated hands and fingers:1.4), (deformed, distorted, disfigured:1.3), poorly drawn, bad anatomy, wrong anatomy, extra limb, missing limb, floating limbs, disconnected limbs, mutation, mutated, ugly, disgusting, amputation"]}, {"id": 8, "type": "VAEDecode", "pos": [1209, 188], "size": [210, 46], "flags": {}, "order": 5, "mode": 0, "inputs": [{"name": "samples", "type": "LATENT", "link": 16, "label": "samples"}, {"name": "vae", "type": "VAE", "link": 8, "label": "vae"}], "outputs": [{"name": "IMAGE", "type": "IMAGE", "links": [9], "slot_index": 0, "label": "IMAGE"}], "properties": {"Node name for S&R": "VAEDecode"}, "widgets_values": []}, {"id": 10, "type": "KSamplerAdvanced", "pos": [862.98046875, 167.984375], "size": [315, 334], "flags": {}, "order": 4, "mode": 0, "inputs": [{"name": "model", "type": "MODEL", "link": 10, "label": "model"}, {"name": "positive", "type": "CONDITIONING", "link": 11, "label": "positive"}, {"name": "negative", "type": "CONDITIONING", "link": 12, "label": "negative"}, {"name": "latent_image", "type": "LATENT", "link": 15, "label": "latent_image"}], "outputs": [{"name": "LATENT", "type": "LATENT", "links": [16], "label": "LATENT"}], "properties": {"Node name for S&R": "KSamplerAdvanced"}, "widgets_values": ["enable", 794547607621135, "randomize", 6, 1.5, "dpmpp_sde", "normal", 0, 10000, "disable"]}, {"id": 6, "type": "CLIPTextEncode", "pos": [415, 186], "size": [422.84503173828125, 164.31304931640625], "flags": {}, "order": 2, "mode": 0, "inputs": [{"name": "clip", "type": "CLIP", "link": 3, "label": "clip"}], "outputs": [{"name": "CONDITIONING", "type": "CONDITIONING", "links": [11], "slot_index": 0, "label": "CONDITIONING"}], "properties": {"Node name for S&R": "CLIPTextEncode"}, "widgets_values": ["instagram photo, front shot, portrait photo of a 24 y.o woman, wearing dress, beautiful face, cinematic shot, dark shot"]}, {"id": 5, "type": "EmptyLatentImage", "pos": [473, 609], "size": [315, 106], "flags": {}, "order": 1, "mode": 0, "inputs": [], "outputs": [{"name": "LATENT", "type": "LATENT", "links": [15], "slot_index": 0, "label": "LATENT"}], "properties": {"Node name for S&R": "EmptyLatentImage"}, "widgets_values": [512, 512, 1]}], "links": [[3, 4, 1, 6, 0, "CLIP"], [5, 4, 1, 7, 0, "CLIP"], [8, 4, 2, 8, 1, "VAE"], [9, 8, 0, 9, 0, "IMAGE"], [10, 4, 0, 10, 0, "MODEL"], [11, 6, 0, 10, 1, "CONDITIONING"], [12, 7, 0, 10, 2, "CONDITIONING"], [15, 5, 0, 10, 3, "LATENT"], [16, 10, 0, 8, 0, "LATENT"]], "groups": [], "config": {}, "extra": {"ds": {"scale": 1, "offset": [2, 0]}, "node_versions": {"comfy-core": "0.3.14"}}, "version": 0.4} |
使用 LoRA
首先我们下载 sd_xl_base_1.0 模型,LoRA 需要使用与之对应的基础模型
1 | cd ComfyUI/models/checkpoints/ |
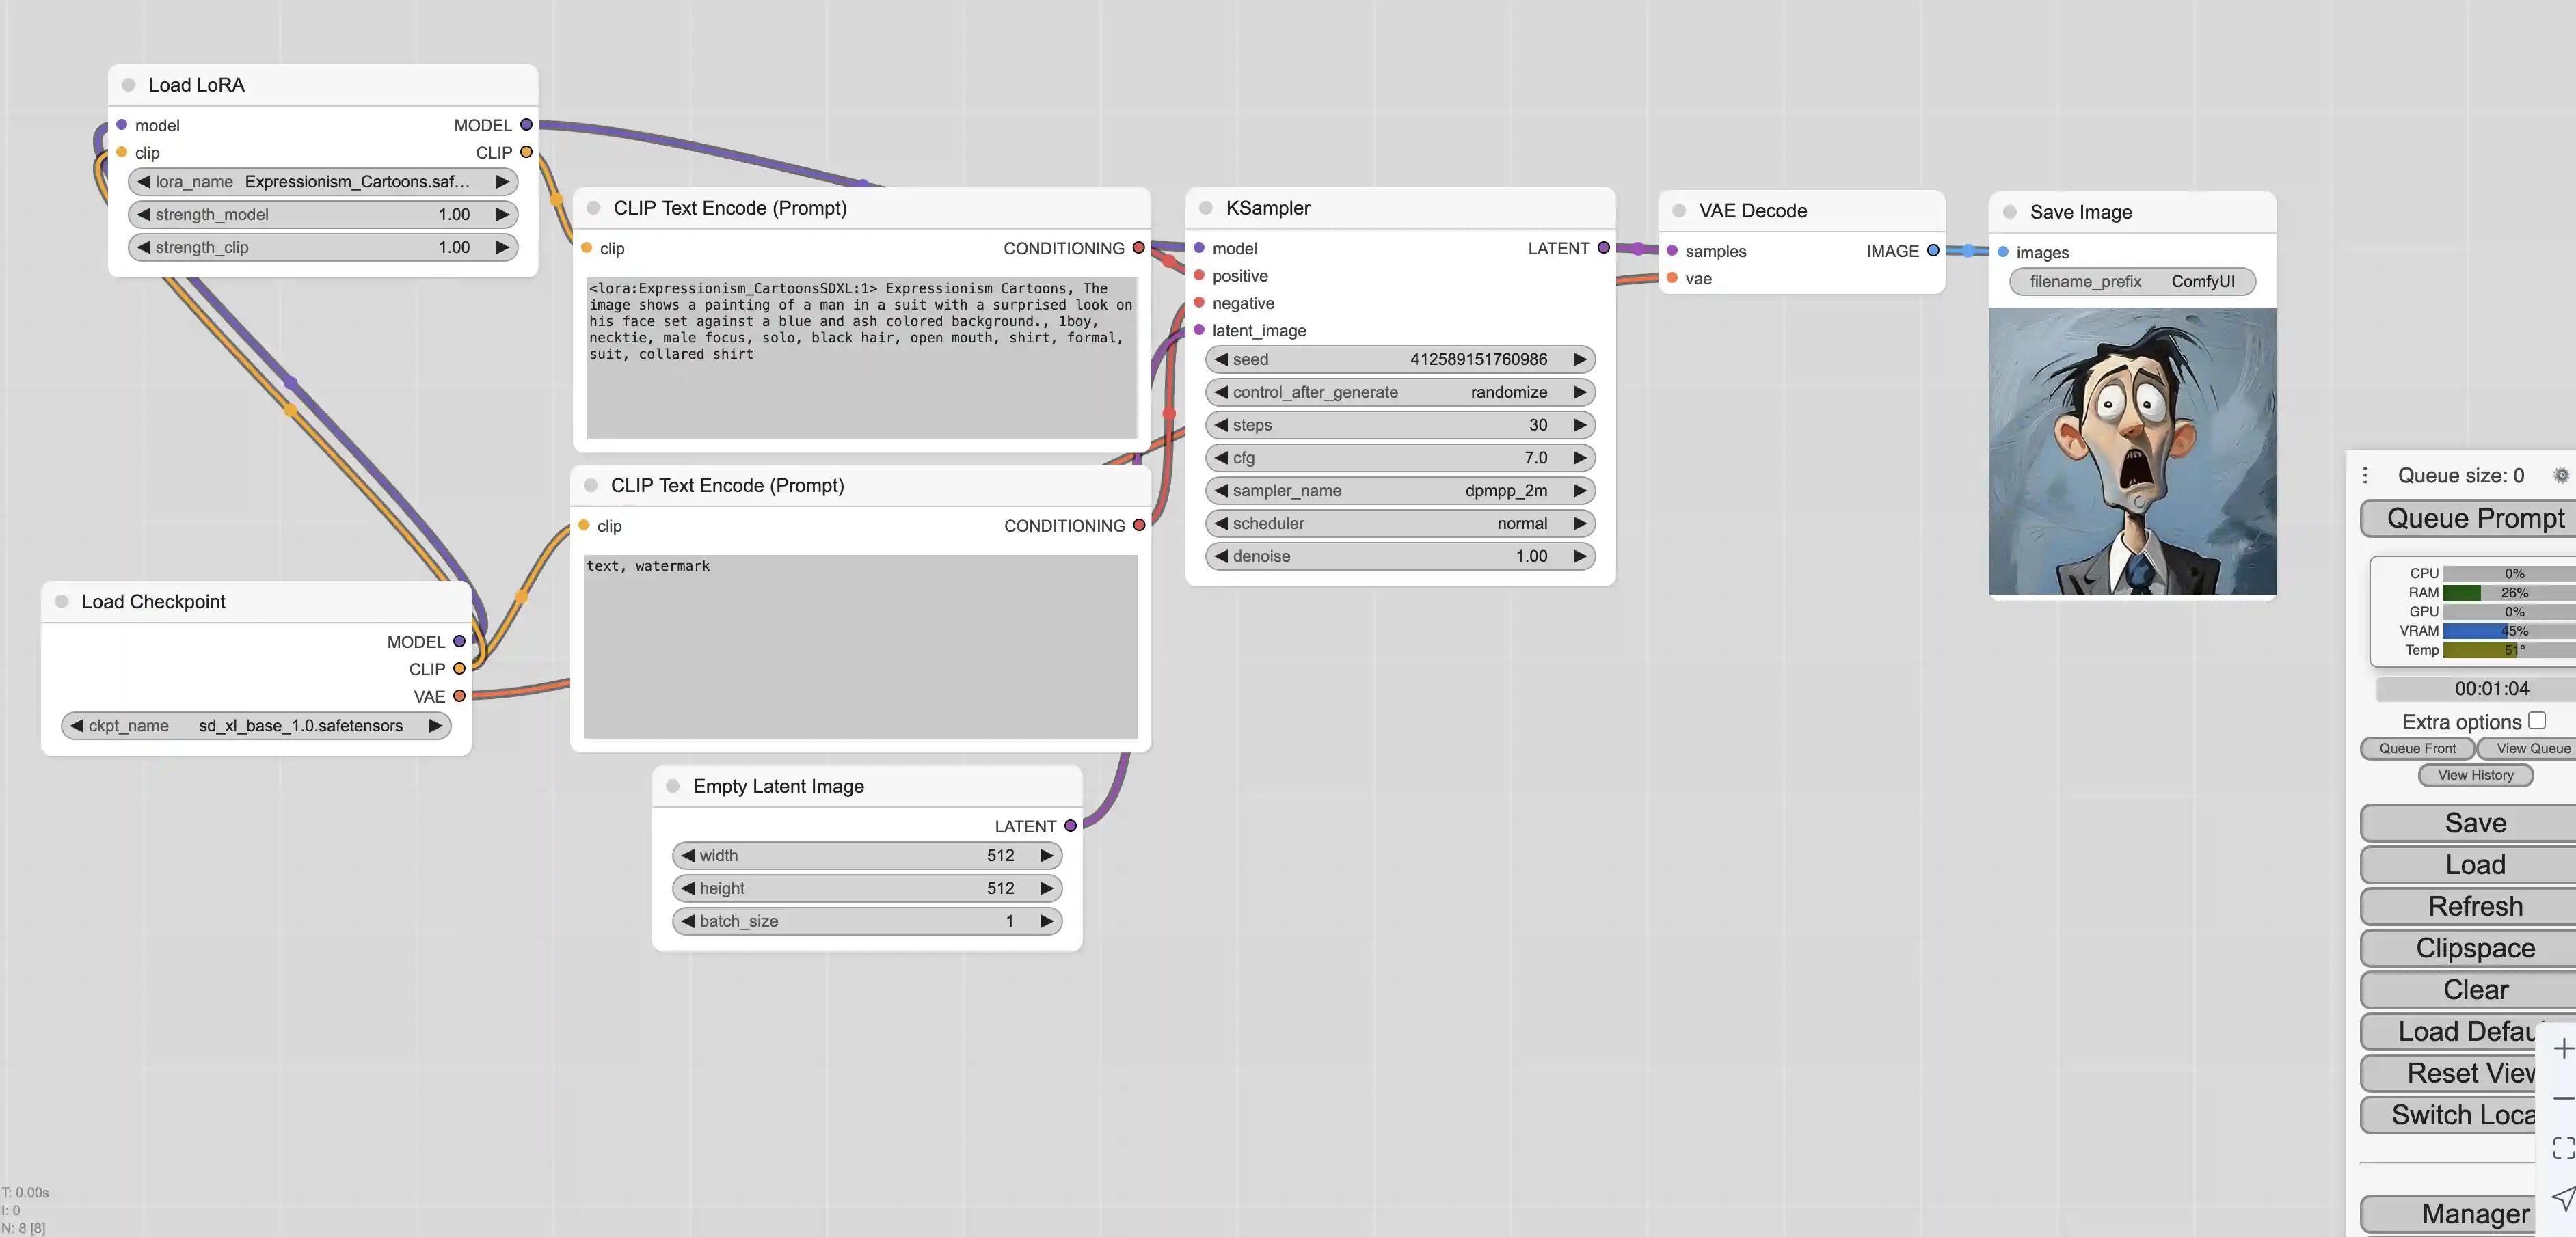
之后我们再下载 LoRA 模型,这里我们使用的是 Expressionism Cartoons 模型
1 | (base) root@VM-0-5-ubuntu:~# cd ComfyUI/models/loras/ |
之后我们根据 LoRA 模型在 Civitai 提供的推荐设置,就可以生成对应的图片了
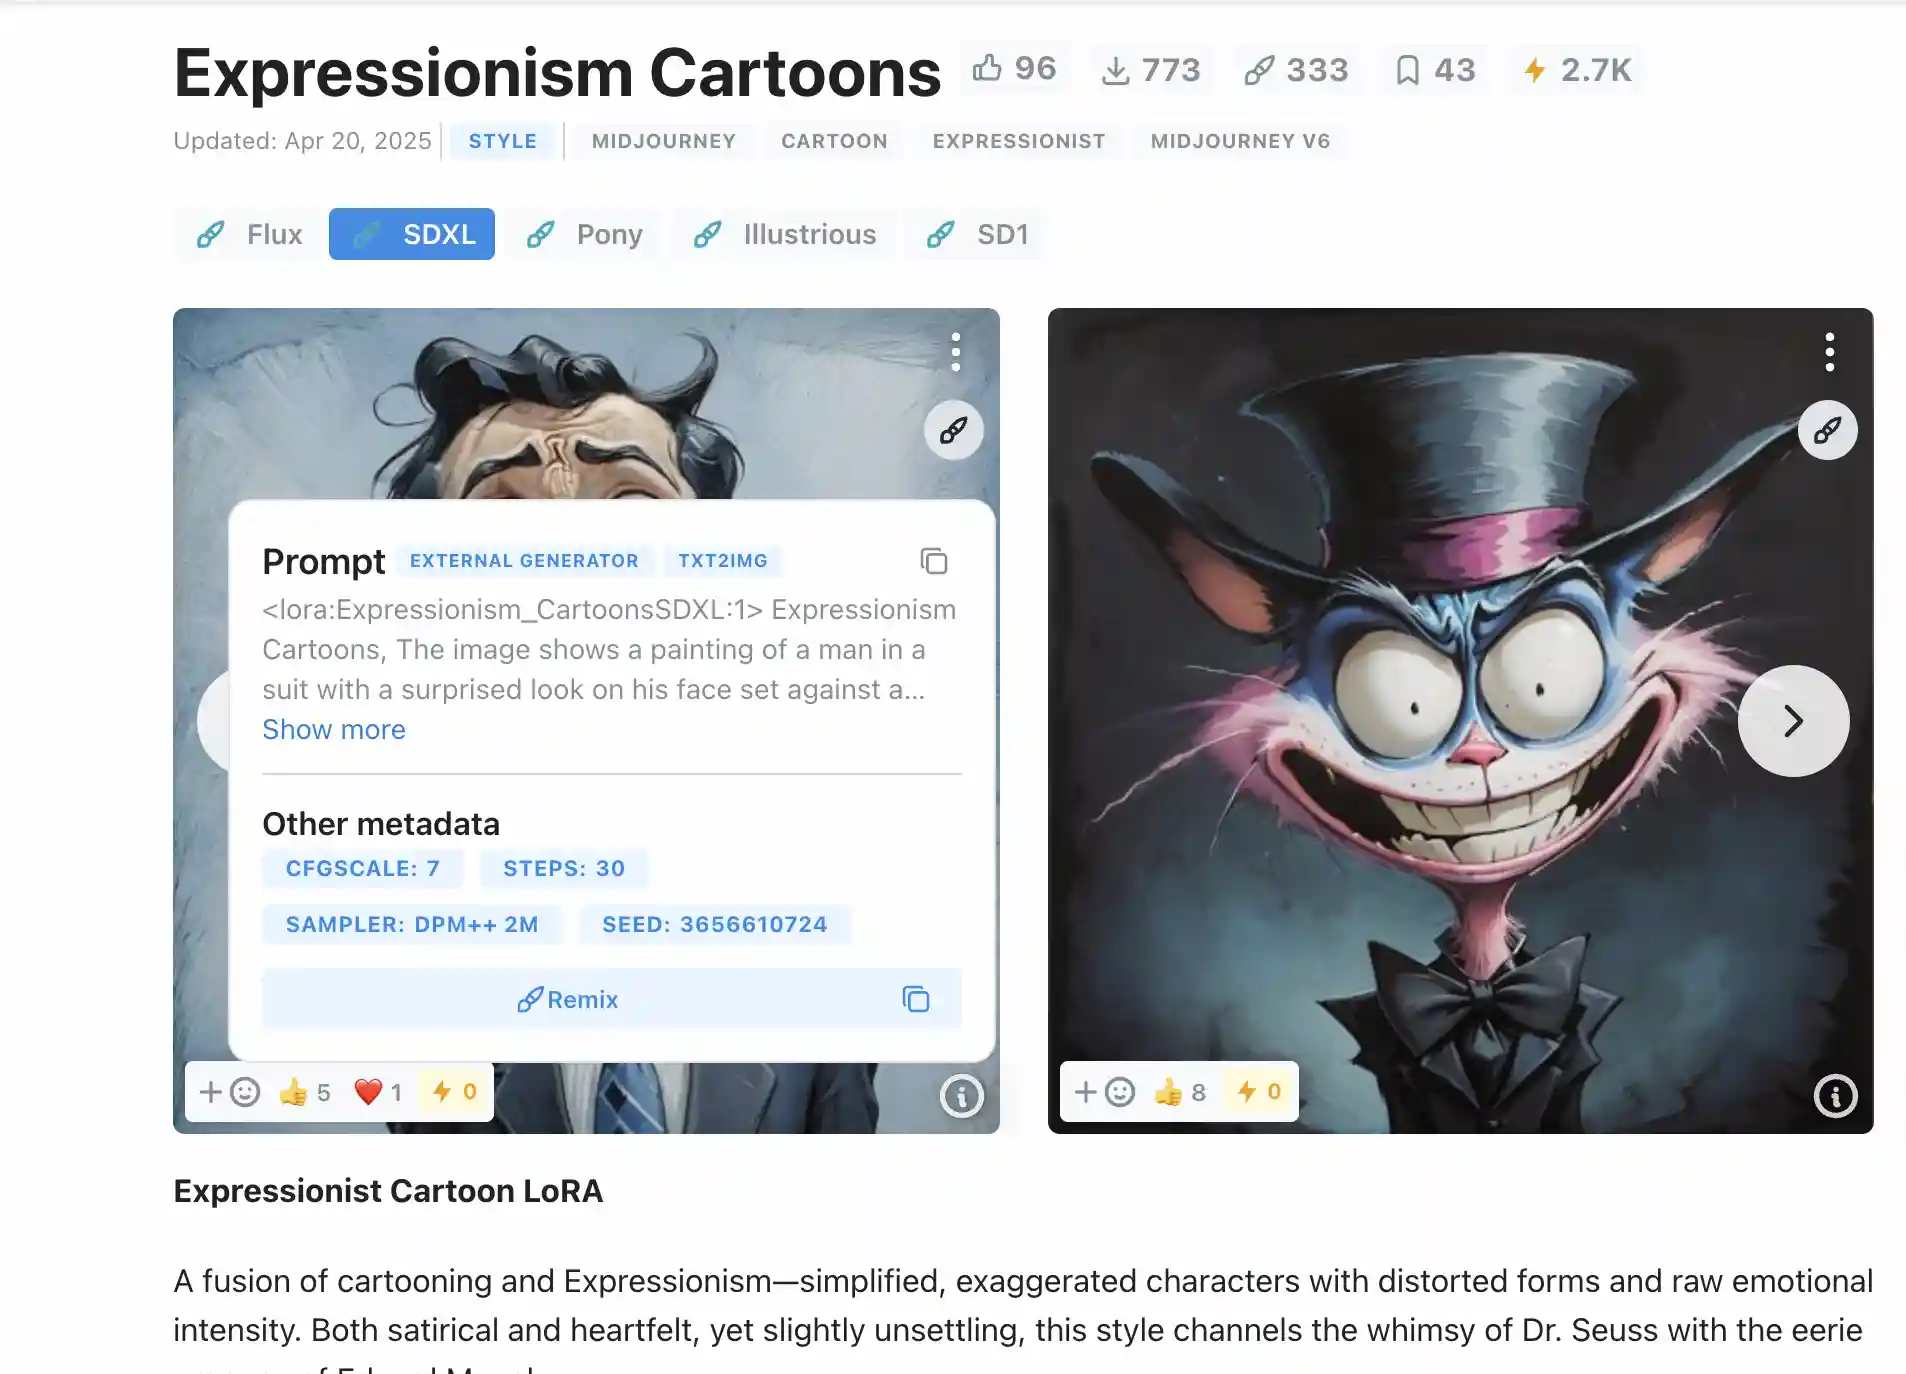
生成的图片如下
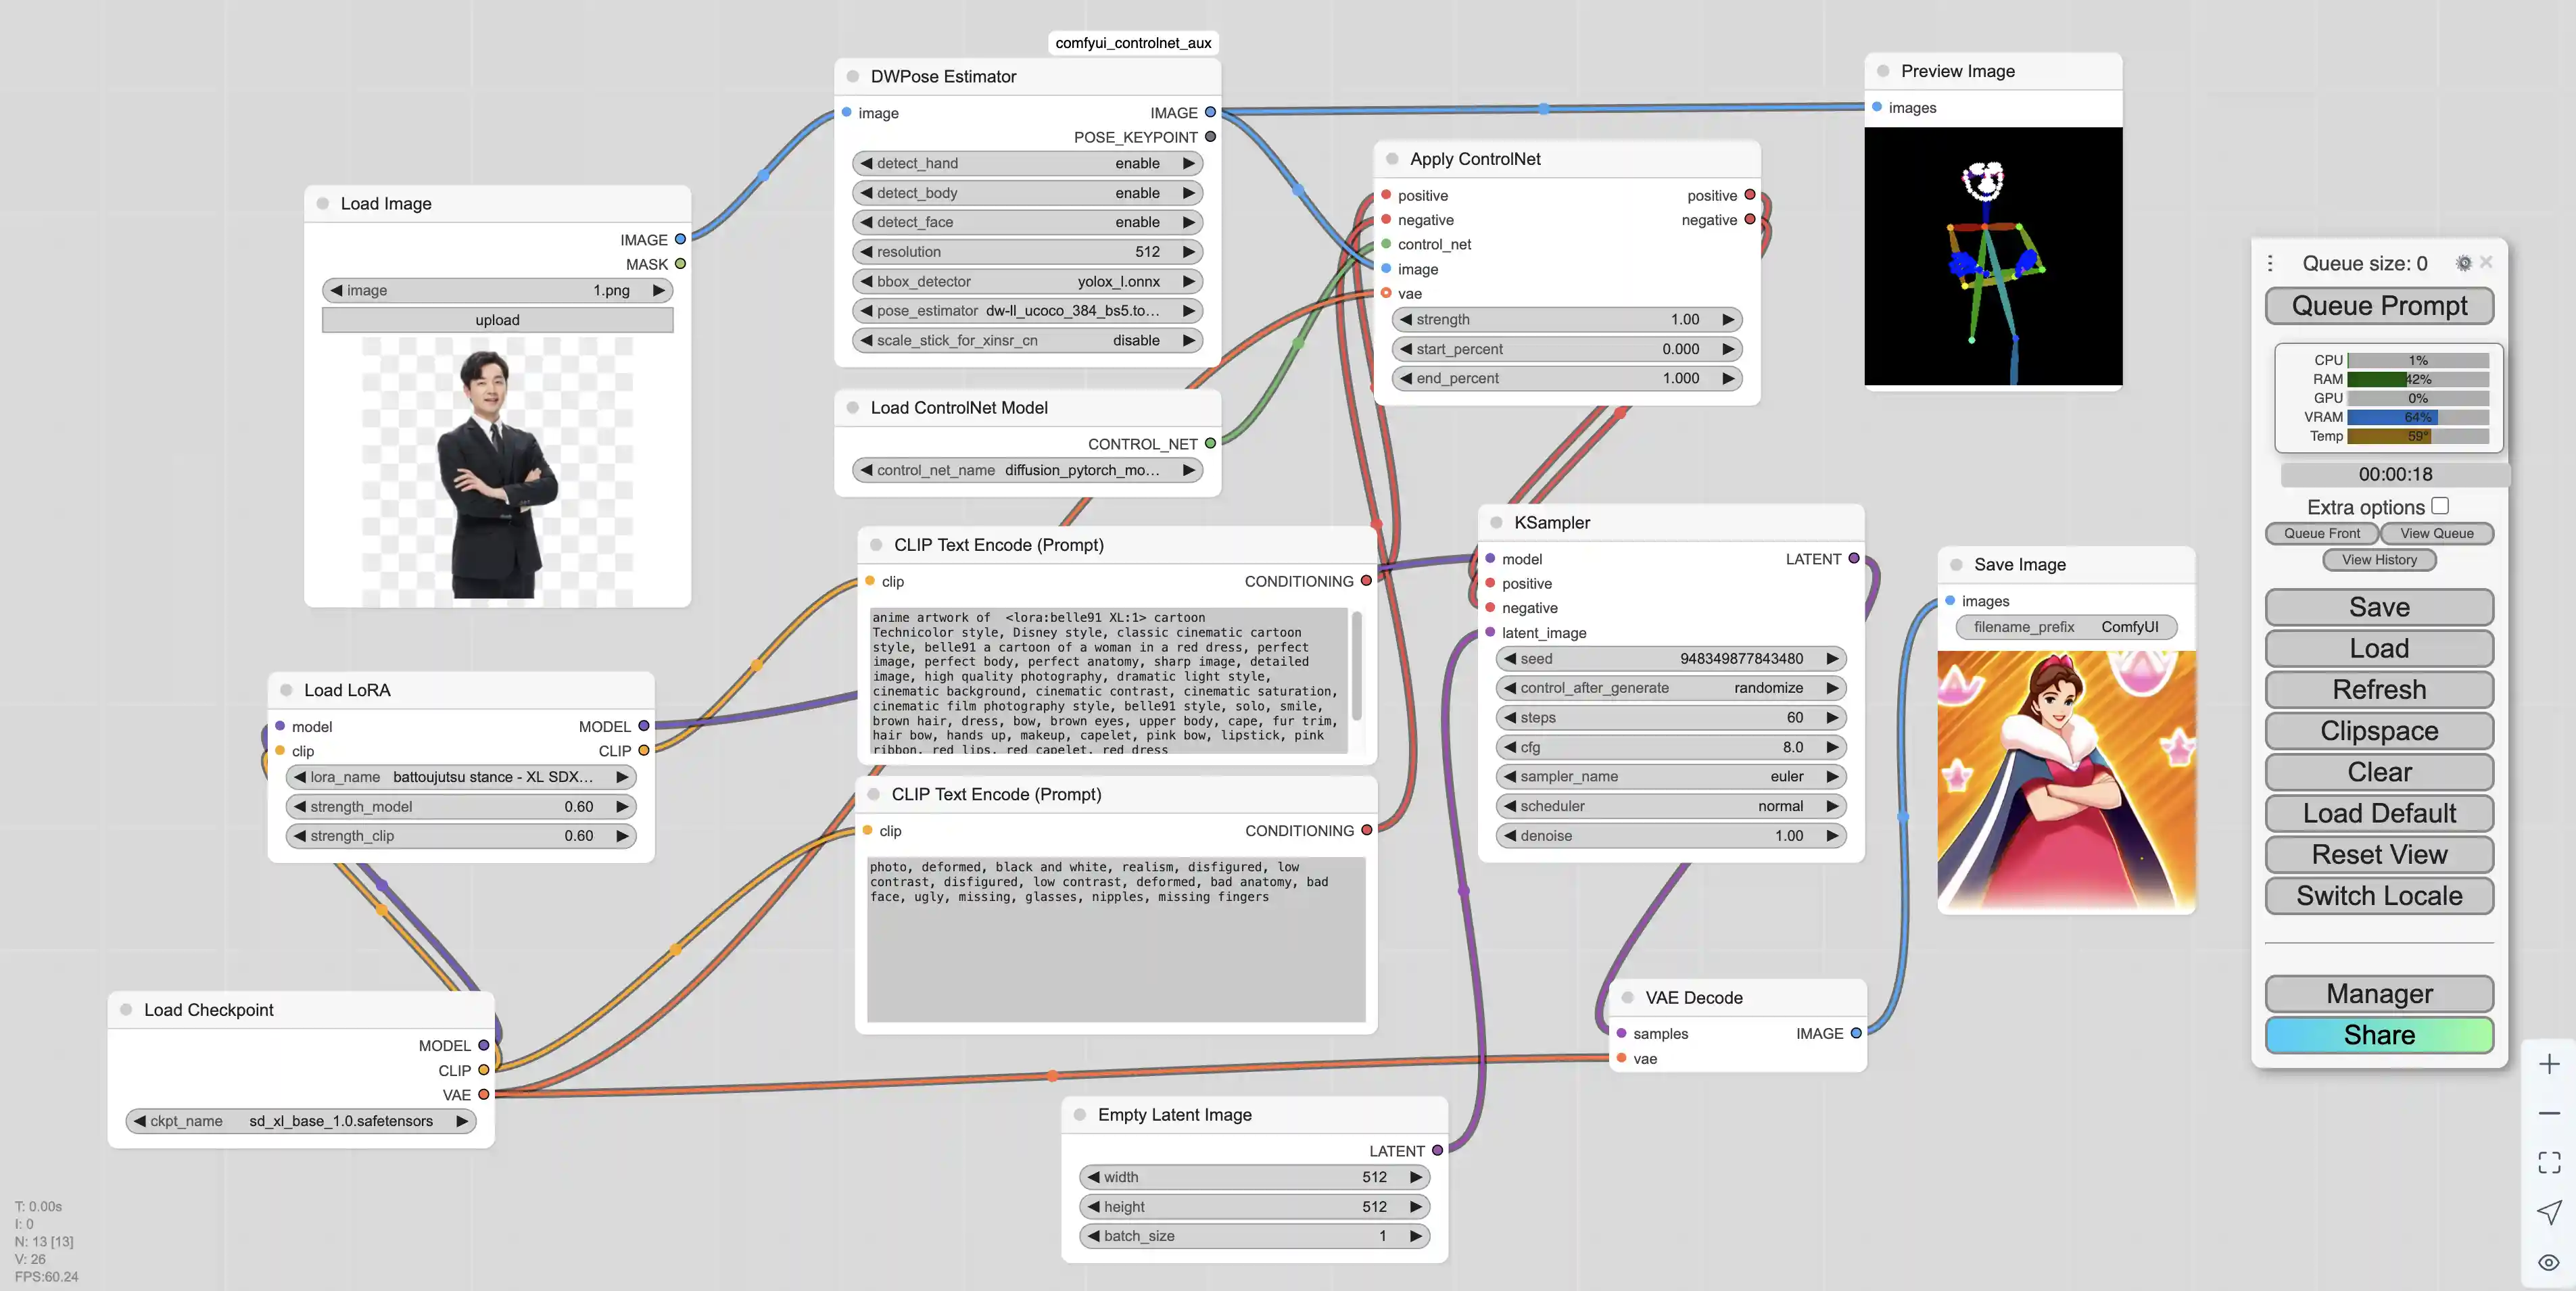
使用 ControlNet
首先需要安装comfyui_controlnet_aux节点,之后还要下载模型。ContrlNet 模型是分版本的,与基础大模型要对应。如果基础模型是 SD1.5,ControlNet 模型也要选择 SD1.5。我们从地址 https://huggingface.co/lllyasviel/ControlNet-v1-1/tree/main 可以下载模型,模型的不同类型含义如下
| 文件名 | 控制类型 | 输入图像类型 | 用途说明 | 推荐用途 |
|---|---|---|---|---|
control_v11p_sd15_canny.pth | Canny Edge(边缘) | 照片或图像 | 提取轮廓边缘 | 建筑、物体结构控制 |
control_v11p_sd15_depth.pth | Depth(深度) | 照片或图像 | 模拟三维深度结构 | 景深、构图调整 |
control_v11p_sd15_inpaint.pth | Inpainting(重绘) | 遮挡/蒙版图像 | 区域重绘 | 修图、局部创作 |
control_v11p_sd15_lineart.pth | Line Art(线稿) | 动漫风图像 | 提取黑白线稿 | 动漫风格建模 |
control_v11p_sd15_mlsd.pth | MLSD(直线检测) | 建筑/结构图像 | 提取直线 | 建筑、平面图等直线构图 |
control_v11p_sd15_normalbae.pth | Normal Map(法线图) | 三维物体图像 | 表面结构建模 | 高级 3D 拟合 |
control_v11p_sd15_openpose.pth | OpenPose(姿态) | 人物图像 | 骨架动作识别 | 指定人物动作/舞姿 |
control_v11p_sd15_scribble.pth | Scribble(手绘草图) | 简笔画、草图 | 草图转图像 | 草图创作、简笔画上色 |
control_v11p_sd15_seg.pth | Semantic Segmentation(分割图) | 分割图(每块颜色代表一种物体) | 提供语义结构控制 | 多物体控制,如人物+背景 |
control_v11p_sd15_softedge.pth | Soft Edge(柔边缘) | 模糊边缘图 | 类似 Canny,但更柔和 | 人像、柔边轮廓控制 |
control_v11p_sd15s2_lineart_anime.pth | Anime Line Art | 动漫线稿 | 动漫草图 → 动漫图 | 高拟真二次元创作 |
我们这里只需要下载我们所需要的模型即可
1 | cd ComfyUI/models/controlnet/ |
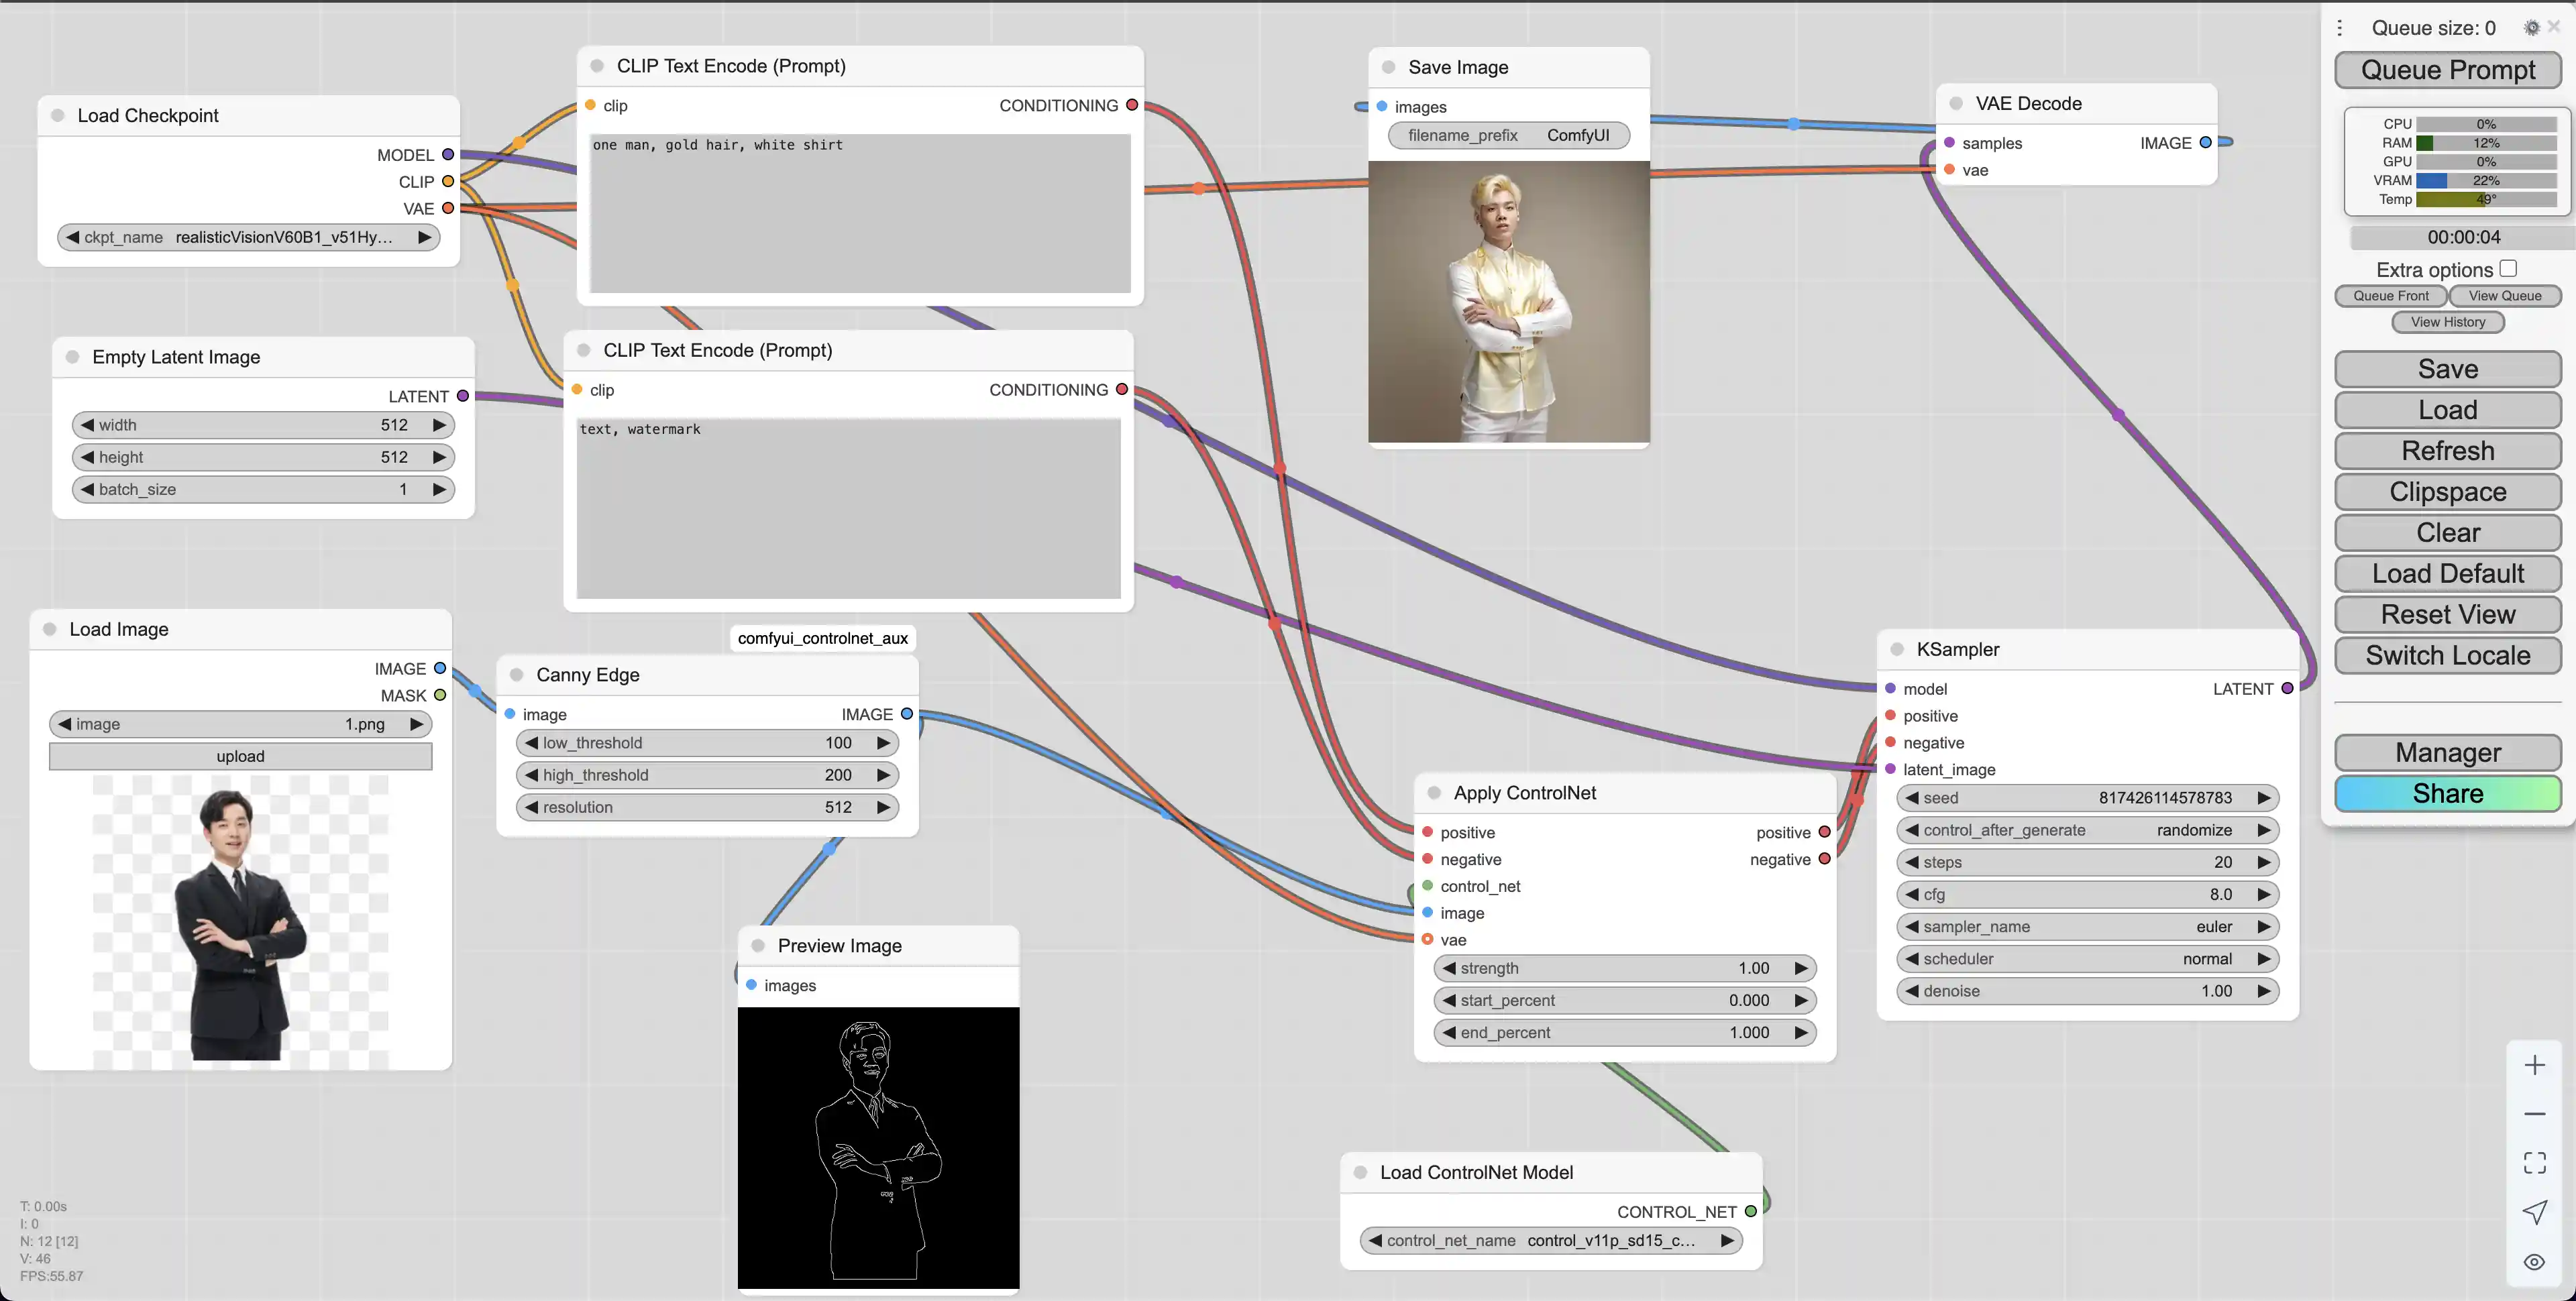
下载好了模型之后我们先新建一个默认工作流。之后创建如下节点:
加载原始输入图像,作为 ControlNet 的参考图像
Add Node -> image -> Load Image
使用 Canny 边缘检测算法提取输入图像的边缘轮廓,生成黑白边缘图
Add Node -> ControlNet Preprocessors -> Line Extractors -> Canny Edge
加载 ControlNet 预训练模型文件,如 control_v11p_sd15_canny.pth 等
Add Node -> loaders -> Load ControlNet Model
将 ControlNet 模型应用到条件编码上,结合边缘图控制生成过程
Add Node -> conditioning -> controlnet -> Apply ControlNet
预览最终生成的图像结果
Add Node -> image -> Preview Image
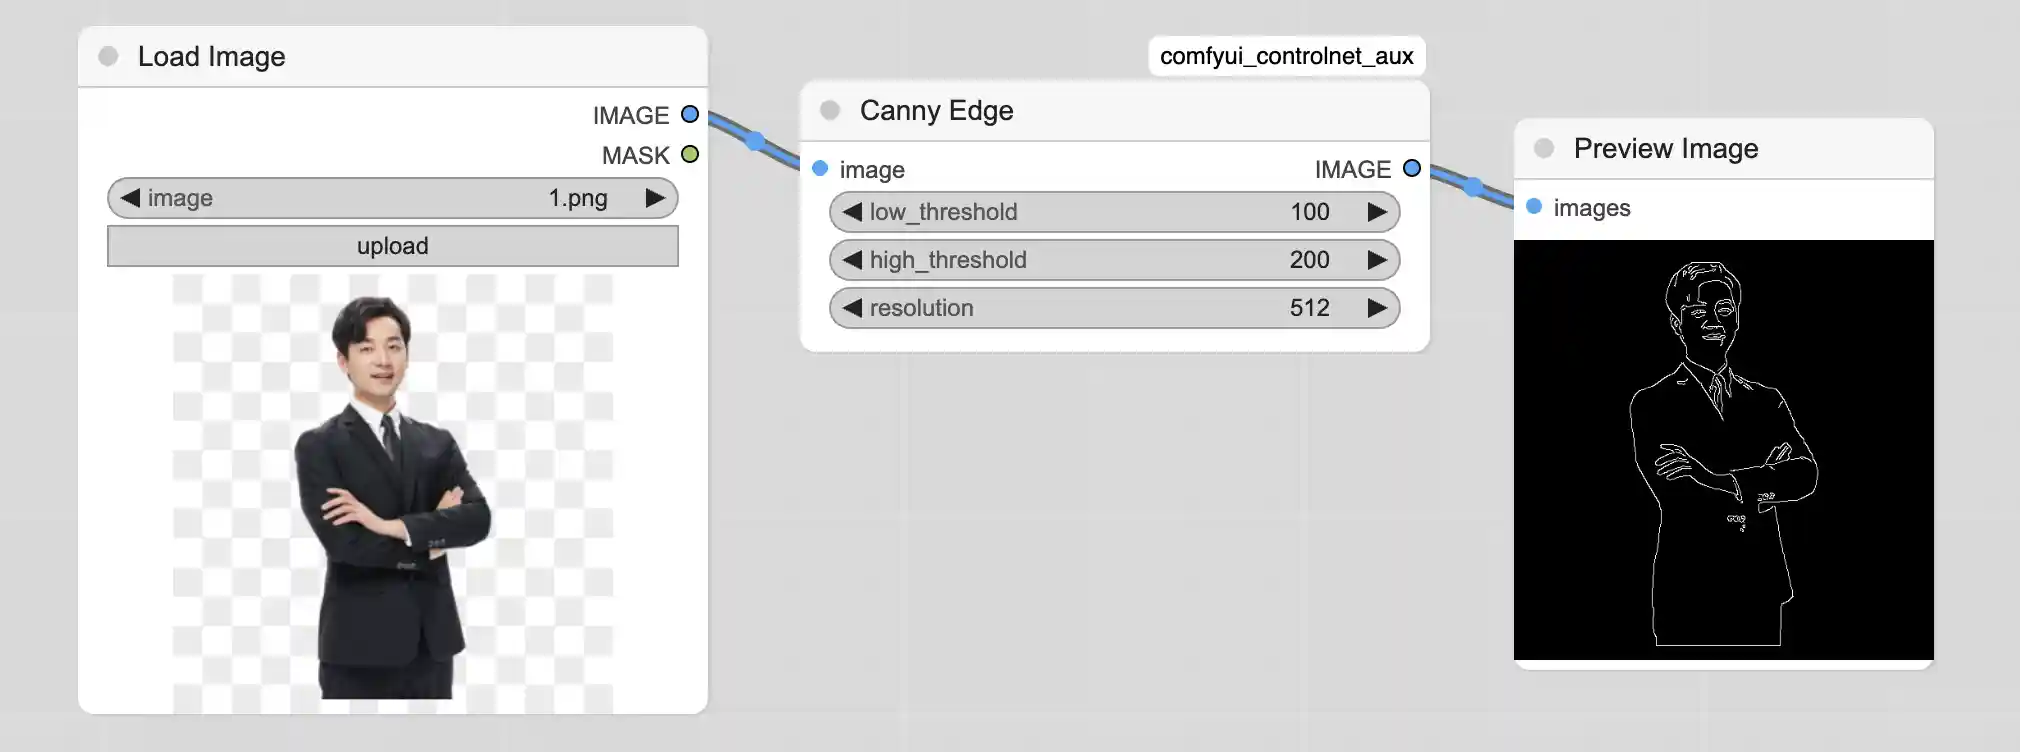
建好了工作节点之后,我们可以使用 Canny Edge 为图片生成线图
之后我们对工作流进行整合,从而根据原图生成类似的图片
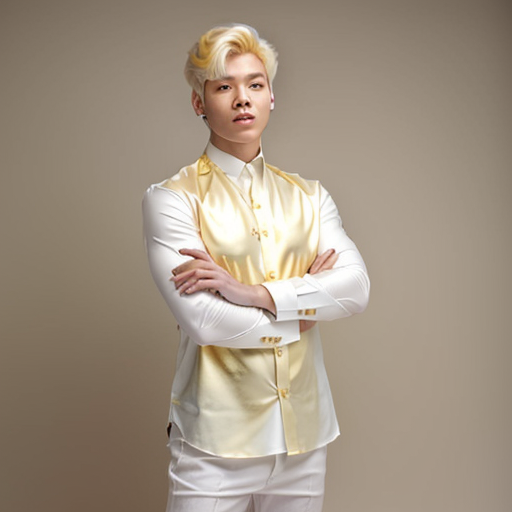
实际生成的图片如下
使用 SDXL 版本的 ControlNet
SDXL 提供了 多合一的 ControlNet 模型,不再需要下载多个文件,只需要使用一个模型即可,能有效节省磁盘空间。
cd ComfyUI/models/controlnet/
wget 'https://huggingface.co/xinsir/controlnet-union-sdxl-1.0/resolve/main/diffusion_pytorch_model_promax.safetensors'
下载好了之后,我们还是先加载默认工作流,之后创建 ControlNet 的相关节点。在创建的时候可以使用鼠标左键快速双击,然后在输入框中搜索需要使用的节点。
因为这里需要使用 SDXL 的模型,所以我们还是使用sd_xl_base_1.0模型,并且搭配 LoRA 一起使用